LiveDrive is one of the fastest growing cloud backup and storage companies serving millions of users. It offers a good range of packages and features to meet your requirements.
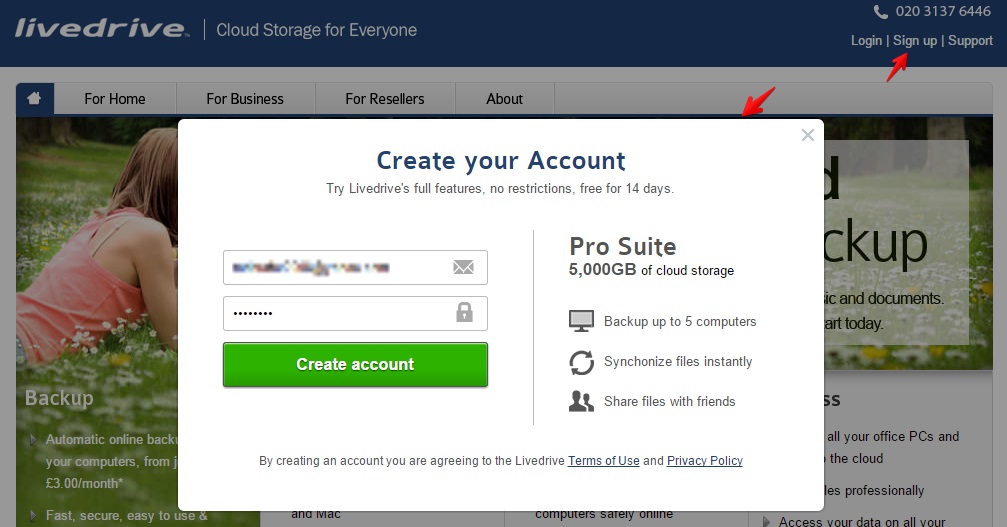
LiveDrive has three core plan structures – for home, for business and for resellers. Each of them offers separate packages to match customers’ needs. The service has apps for Windows (PC and Tablet), Mac OS X, iOS, Android, Blackberry Playbook and Kindlefire including Chrome browser extension. Its web version comes with support for both desktop and mobile browsers. Currently LiveDrive has no free plans. But it allows 14-day free trial registration. You will need to add a payment method while the trial sign up.
Recently I have tried LiveDrive Home Pro Suit. Here I will share my experience with you. Before going into details, let’s know the pros and cons.
Pros
- LiveDrive’s user interface is clean and intuitive
- Unlimited storage
- Easy file sharing
- File versioning
- Encryption (server-controlled)
- Supports FTP, SFTP and WebDAV
Cons
- No free package
- Requires to add a payment method while sign-up
- No live chat or phone support
- No on-demand encryption
What People Say About LiveDrive?
LiveDrive has been able to achieve a position among the cloud people. Although this position is not just positive from all perspectives. I found some people who liked LiveDrive’s ‘2-in-one’ strategy which offers both cloud storage and online backup facilities. Users also like its unlimited storage offering. A user commented that LiveDrive is “probably the best cloud storage on the web”, he liked it because LiveDrive does not push users to sign up for the service.
However, I also noticed some negative notes as well. Mainly, lack of a free package and easy trial registration (without credit card) got a bold appearance. Not having a live chat support is also another matter that is disliked by users.
This article contains a good number of sub-topics. So I hope a table of contents will make it easier to navigate among them. So, here I put a table of contents:
[table colwidth=”350|350″]LiveDrive Web,
Uploading a File,The File Menu
Adding a New Folder,Handling Media Files
Other File Options,Editing and Versioning Documents
The Backup Section,Sharing and Collaboration
Settings,Help and Referral Sections[/table]
[table colwidth=”350|350″]LiveDrive Windows Desktop App,
The Briefcase Explorer,Sharing
Managing Backups,Restoring Backups
Settings,Bonus: Support[/table]
LiveDrive Hands-On
As I have already mentioned, LiveDrive offers web, desktop and mobile apps. In this post I will cover the web and desktop (Windows) versions. At first we will see the web version and then we will experience its Windows desktop app. Let’s start.
LiveDrive Web
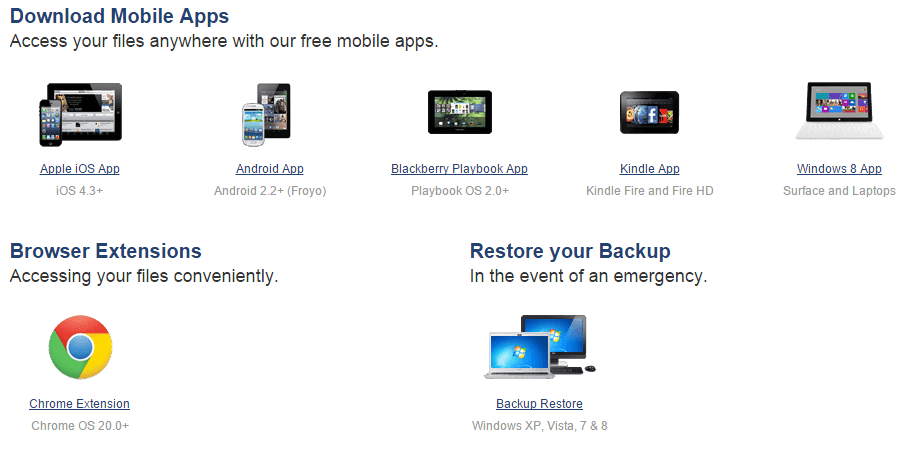
After the registration, login to LiveDrive by visiting www.livedrive.com. The welcome page will show you the available LiveDrive apps for multiple platforms.
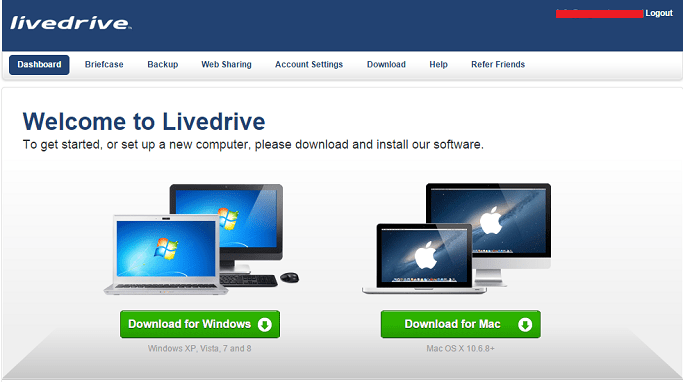
I downloaded its Windows app from here. The file size was about 10.4 MB (version 1.15.2.0). A ‘Download’ section is also there with all LiveDrive app-links. The first page is called ‘Dashboard’. It just introduces you with the service.
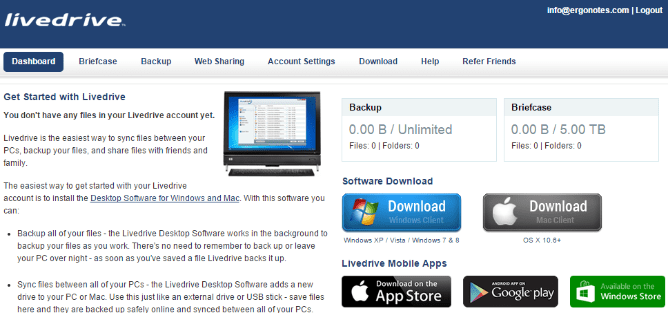
The Dashboard shows the storage statistics, app downloads, LiveDrive blog posts etc.
Uploading a File
The ‘Briefcase’ section is the place where you can upload and manage files on LiveDrive.
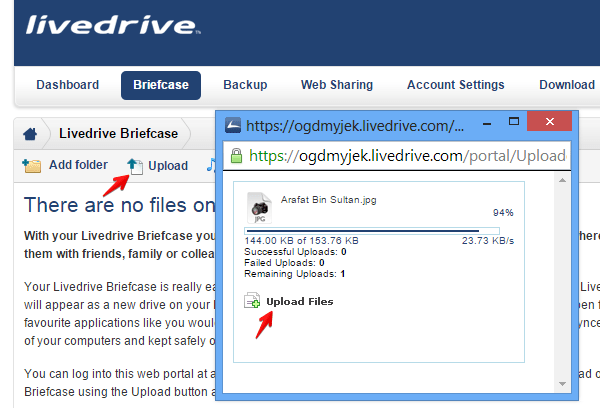
Click the ‘Upload’ button to add a file to your LiveDrive briefcase. Locate your target file using the uploader popup window. A progress bar will appear while the upload.
The File Menu
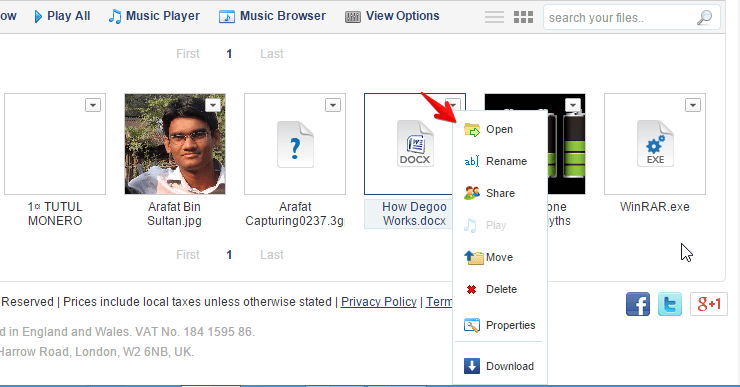
A menu icon (small triangle) is placed on each file’s upper right corner. Clicking on that tiny icon brings the file menu. If you right click on a file, the same menu will appear.
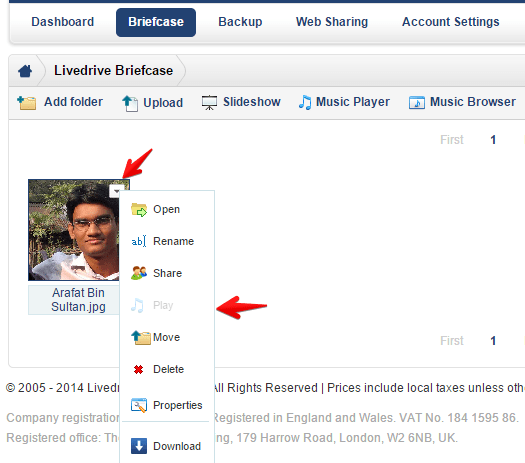
From here, you can open (where applicable), rename, share, move, delete or download contents. This menu also allows you to see the properties of the target file/folder. LiveDrive can play music and video clips on the cloud.
Adding a New Folder
You can easily add a new folder in your LiveDrive briefcase. Just click the ‘Add Folder’ option found on the left side of the toolbar, give a name and click the ‘Add’ button.

The new folder will be crated and show-up inside briefcase.
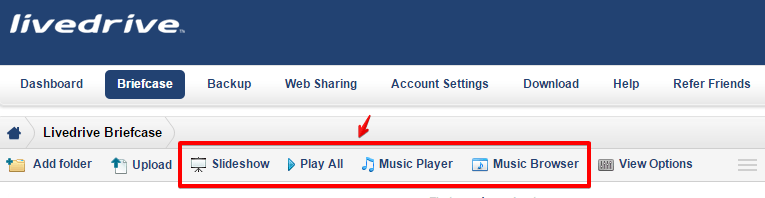
Handling Media Files
As I already talked about, LiveDrive can stream media files from the cloud. You can browse and play music inside the briefcase. There is also another option to view images as a slideshow.
Other File Options
In LiveDrive, you get two interesting file options. Here you can opt-in/opt-out showing the deleted or hidden files.
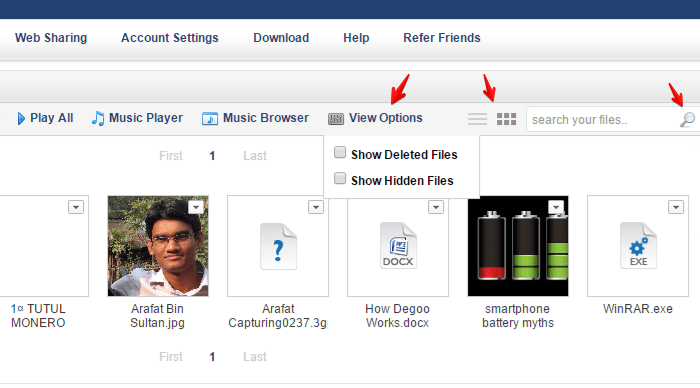
There is a search facility as well. And yes, you can arrange your contents in list/grid view too.
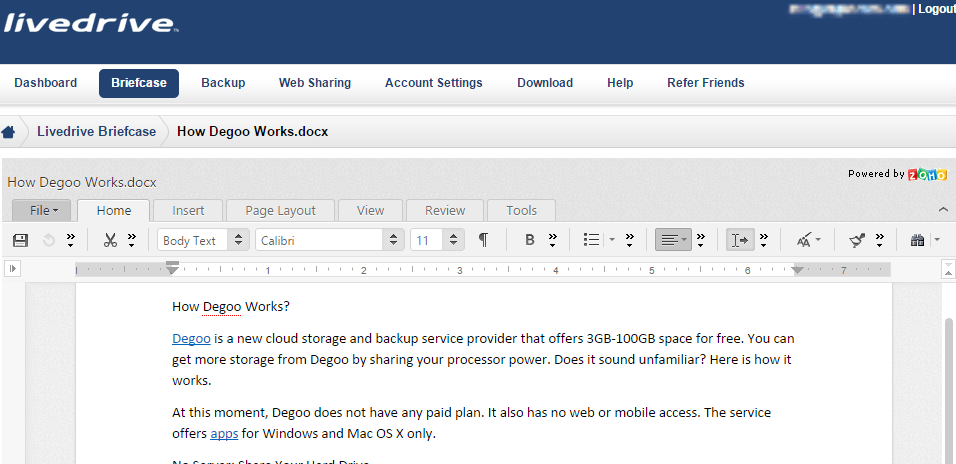
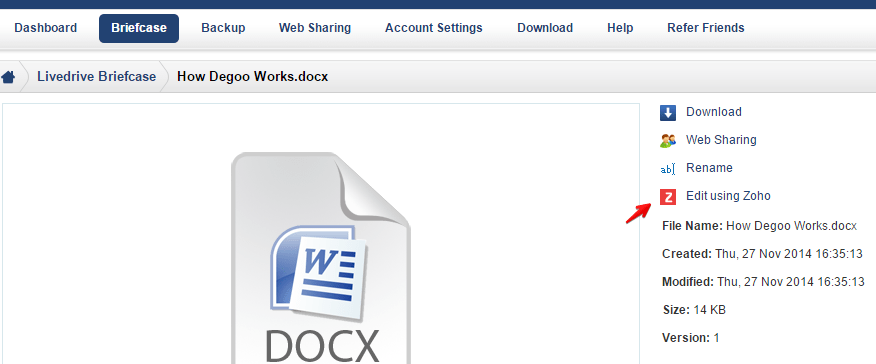
Editing and Versioning Documents
LiveDrive enables documents editing on the cloud using Zoho. To edit a document, at first right click on it and select ‘Open’.
A new page will show the document’s properties along with some options. From here you can edit the document with Zoho.
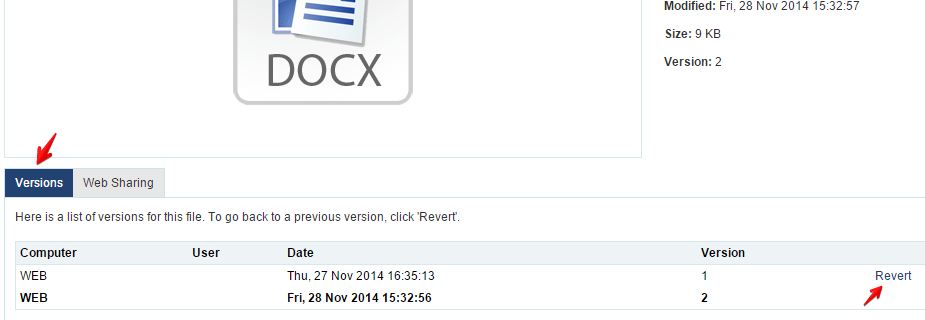
Restoring available versions of a file is also possible in LiveDrive. The service keeps up to 30 versions of your files. You can restore any of them at any time using its web portal only. To restore another version of a file, first right click on that and select ‘Open’. You will get ‘Versions’ section at the bottom-right side of the subsequent page.
Simply click the ‘Revert’ option found beside saved version titles. Your file will be restored to that specific state.
The Backup Section
On LiveDrive web, you can view the backup files that were uploaded from your device(s). Here you can’t edit or delete the backups. LiveDrive allows to download them from the web.
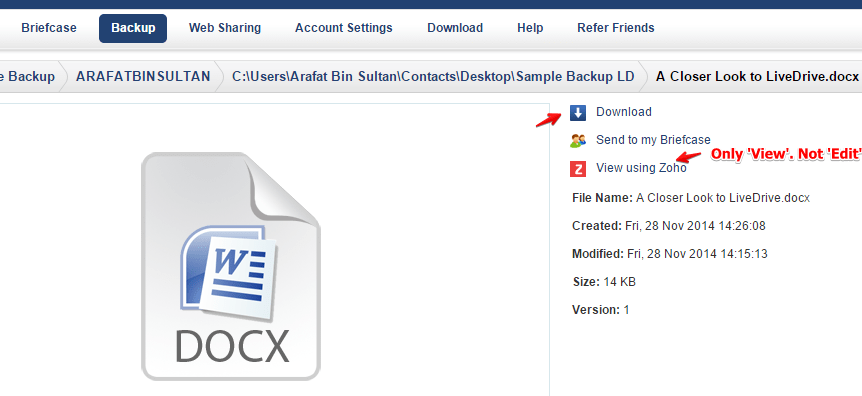
But if you need to edit backup documents on the cloud, you can send them to the briefcase from the backup folder and then edit.
Sharing and Collaboration
With LiveDrive, you can share files to collaborate with others. To use this feature, visit your briefcase and right click on a file that you want to share. A context menu will appear.

Click on ‘Share’. It will bring sharing options.
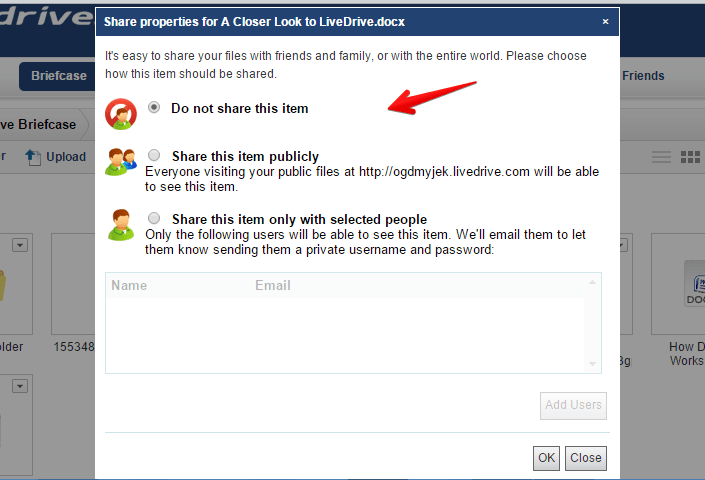
Choose a sharing option and click the ‘OK’ button to confirm. You will get a confirmation message and share-settings options there.
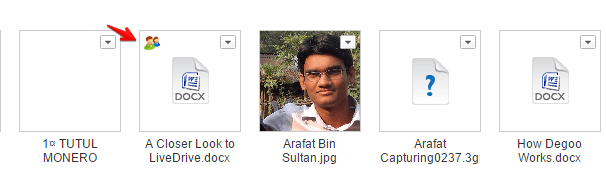
The shared file will get a special sign. The sign appears on the upper-left corner of the file’s thumbnail.
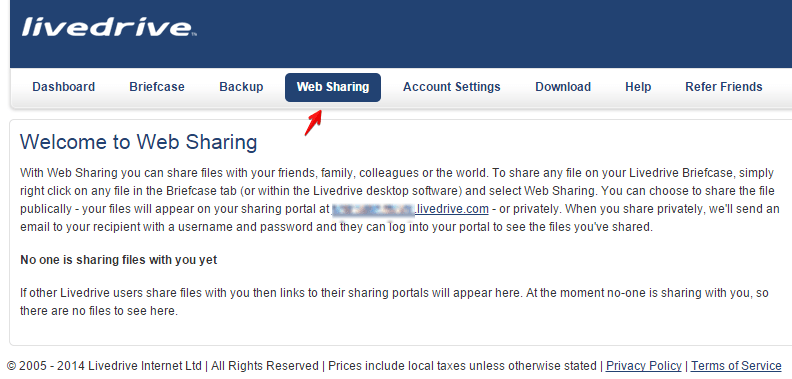
If other LiveDrive users share files from their briefcases with you, these can be found in the ‘Web Sharing’ section.
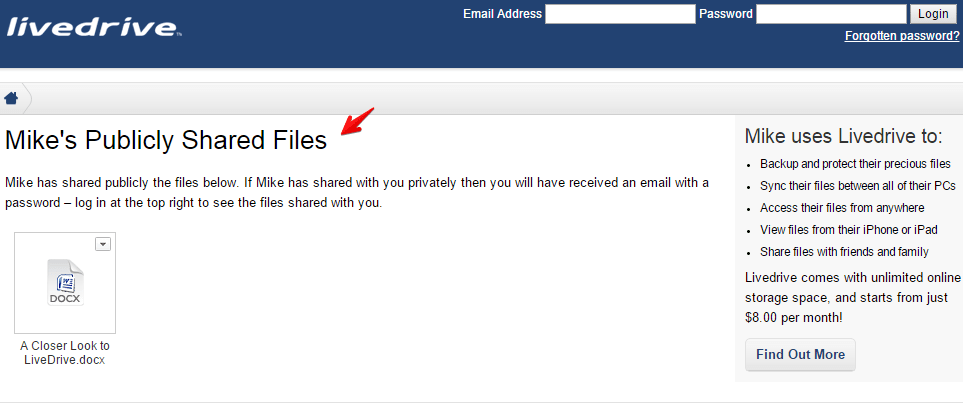
The publicly accessible ‘Shared Files’ page is another interesting feature in LiveDrive. Your publicly shared files and folders can be downloaded from this page. Its address is something like ‘https://example.livedrive.com/’. You can customize this link by visiting account settings page.
Settings
LiveDrive web has an ‘Account Settings’ section from where you can view and manage your account details.
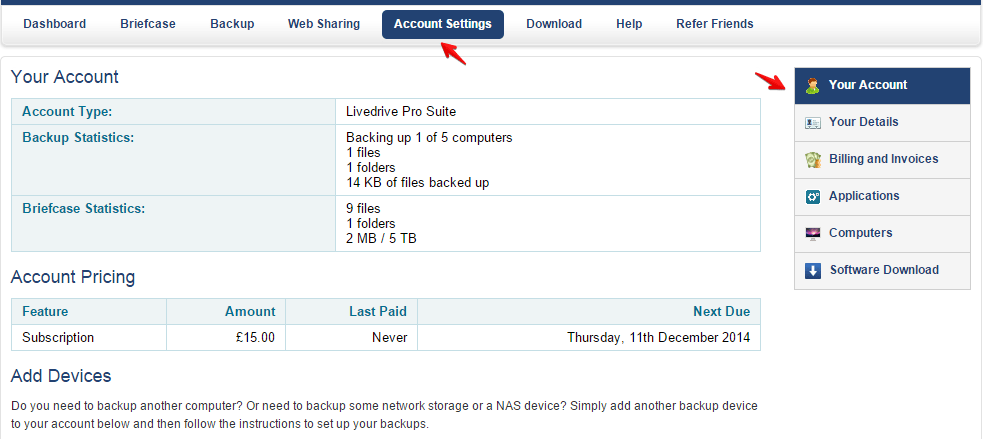
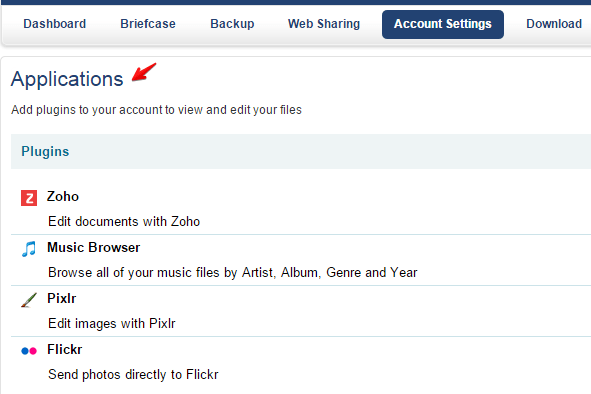
It contains options to update your personal and billing information. You can install and activate/deactivate third party applications in LiveDrive from this page.
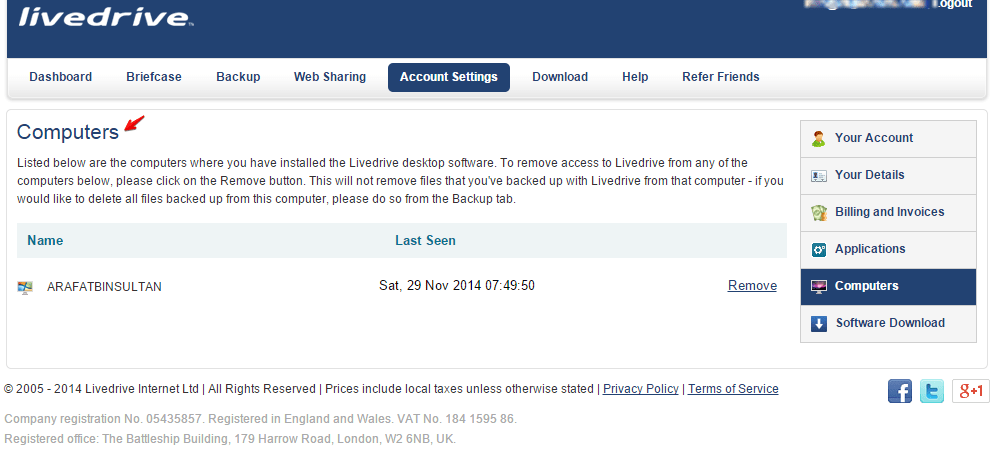
The ‘Computers’ section shows the computers that are currently linked with your LiveDrive account.
The ‘Software Download’ page provides links to download LiveDrive desktop and mobile apps.
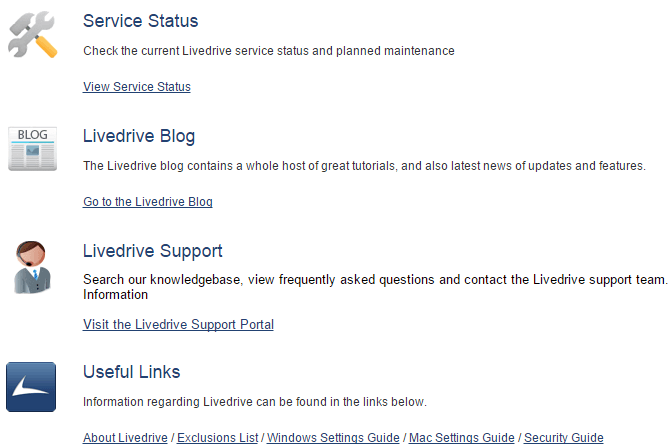
Help and Referral Sections
The help section provides links to LiveDrive blog, support, service status and other useful pages.
You can earn three months free LiveDrive subscription for each successful referral registration.
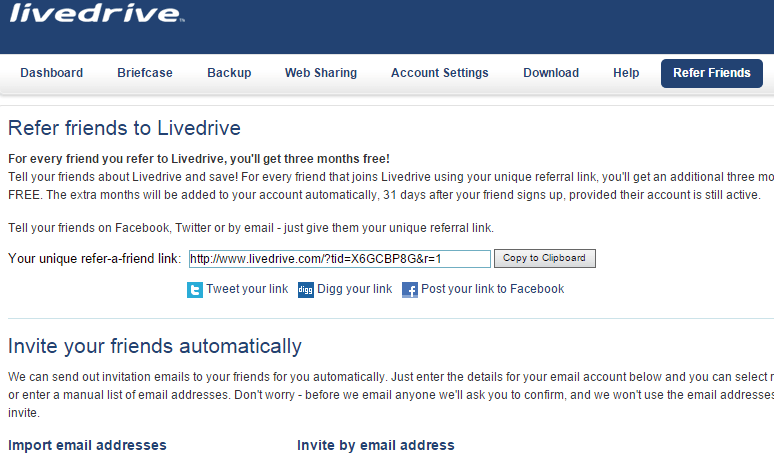
The ‘Refer Friends’ section also has a tracking feature which shows you the progress of your invitations.
This was my experience with LiveDrive web. Now let’s have a tour to its Windows desktop app.
LiveDrive Windows Desktop App
After downloading the LiveDrive app, install it on your computer, open the program and login with your email-password.
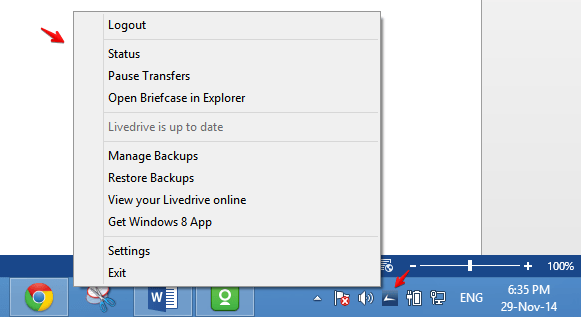
The app runs on your system tray. Clicking on the app icon will just open a menu bar containing some program options. From here you can quickly pause/resume the synchronization, download Windows 8 style touch based LiveDrive app and visit the service’s web portal as well.
The ‘Status’ section will show you the current activity summary of your LiveDrive app. More specifically, it shows the status of the backup and briefcase (sync) jobs.
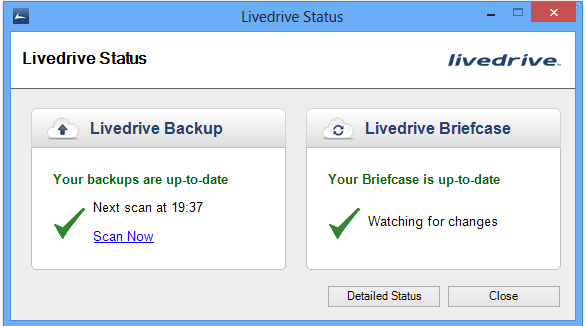
To learn what’s happening inside your LiveDrive app, click the ‘Detailed Status’ button. You will see each and everything in action.

The Briefcase Explorer
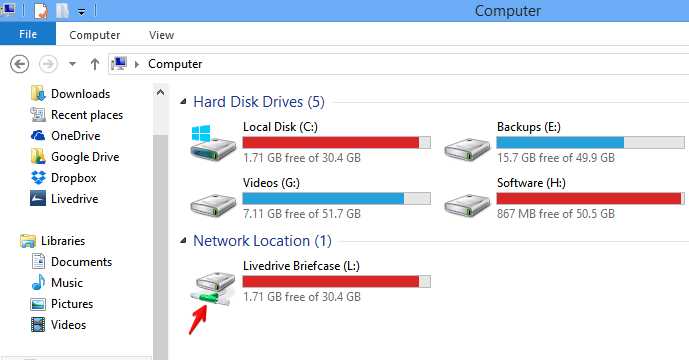
When you install and login to the LiveDrive app, it maps a network drive in your computer. The new drive is shown in your ‘My Computer’ drive interface.
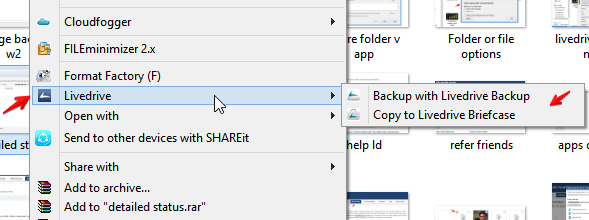
The LiveDrive app adds a special item to your context menu. If you right-click on a content inside the briefcase (the network drive), you can see ‘LiveDrive’ menu option. Hovering mouse on this item will expand four more options.
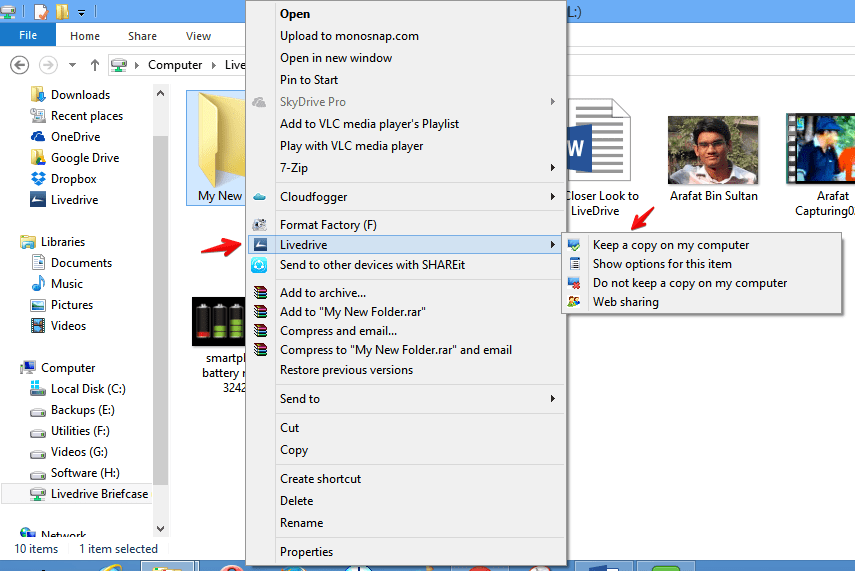
So, you can choose whether to keep a copy of your files both in LiveDrive cloud and in your local drive. Use the ‘Keep a copy on my computer’ and ‘Do not Keep a copy on my computer’ options for this purposes.
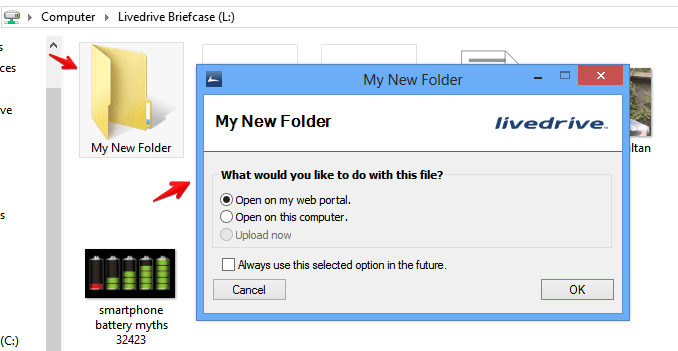
Click on ‘Show options for this item’ to see what more you can do with a file inside the briefcase. Outside the mapped drive, when you right click on a content and go to ‘LiveDrive’ menu, you will get backup and copy to briefcase options.
Sharing
To share a file/folder which is stored on LiveDrive, first right click on the target content, go to ‘LiveDrive’ menu and click ‘Web sharing’. A share window will appear.
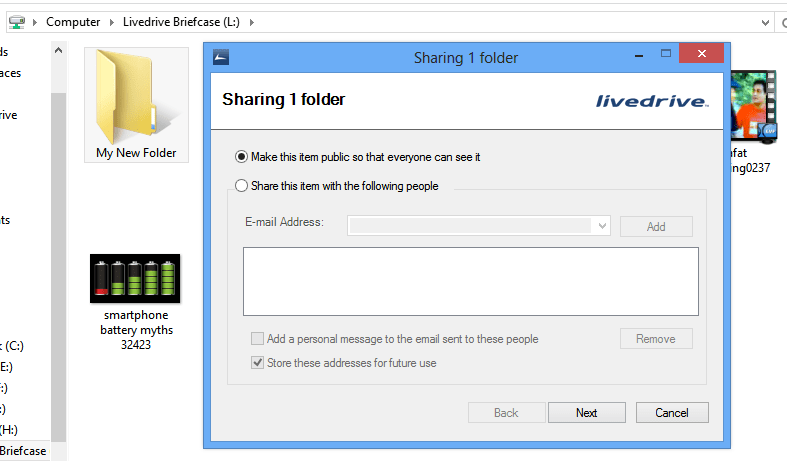
From here, you can share contents with others either publicly or privately using specific user’s email address.
To stop sharing a content, again go to ‘Web sharing’ window and click ‘Stop sharing’ button located on the bottom left corner.

Managing Backups
As you already know, LiveDrive lets you keep backup copies of your files. To enjoy this benefit, at first you need to configure the feature. Click on the LiveDrive system tray icon to get the menu bar.
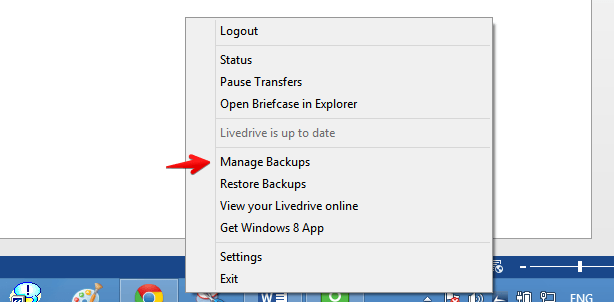
Now click ‘Manage Backups’ to enter into the backup environment.
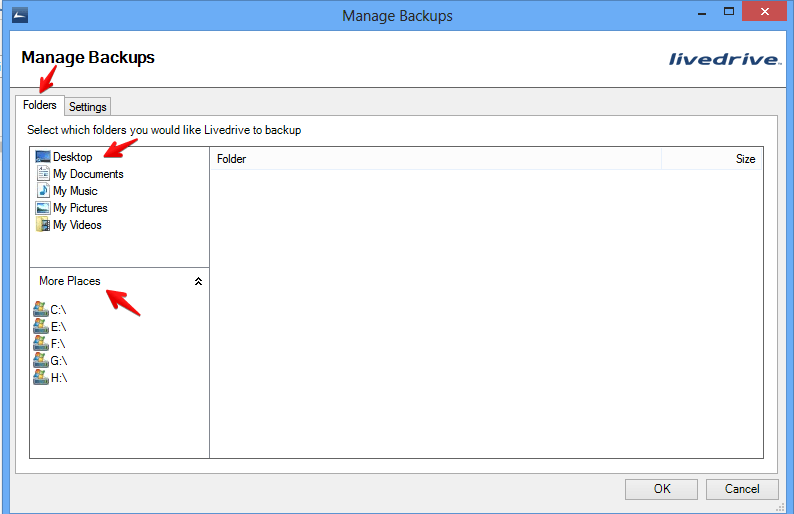
It will bring the backup management window. It’s a nearly blank window at the first look.
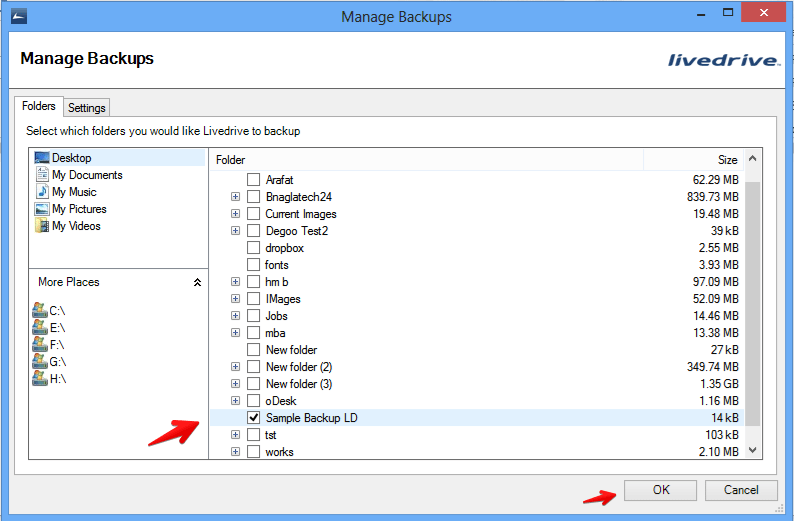
Go to your desired location from the list shown at the left side, select a folder and click the ‘OK’ button to confirm. The target folder will be backed up according to a default predetermined schedule. You can change this schedule from the ‘Settings’ tab on the ‘Manage Backups’ window.
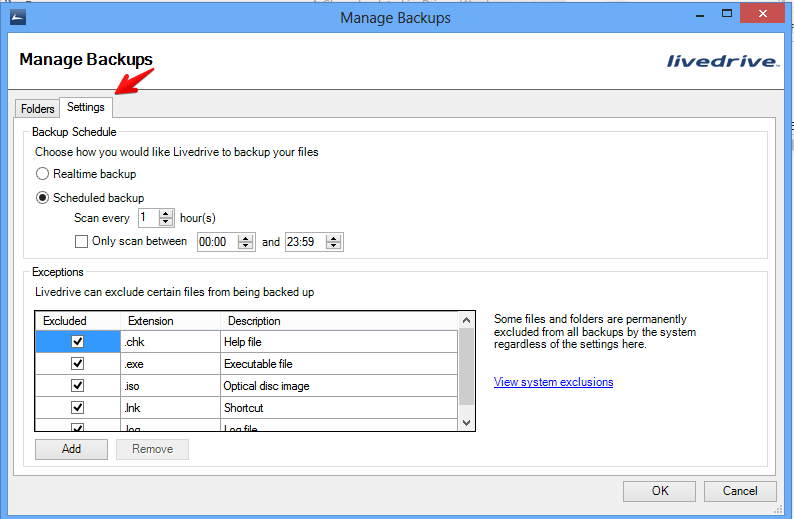
So, you can make the LiveDrive app keeping an eye on the backup folder in real time to upload the changes. Or if you like, the program will scan the target folder in a certain interval. Also you can exclude some specific file-types from the backup.
Restoring Backups
To restore your previous backups, click LiveDrive’s system tray icon and go to ‘Restore Backups’.

A new window will appear with restoring tools.
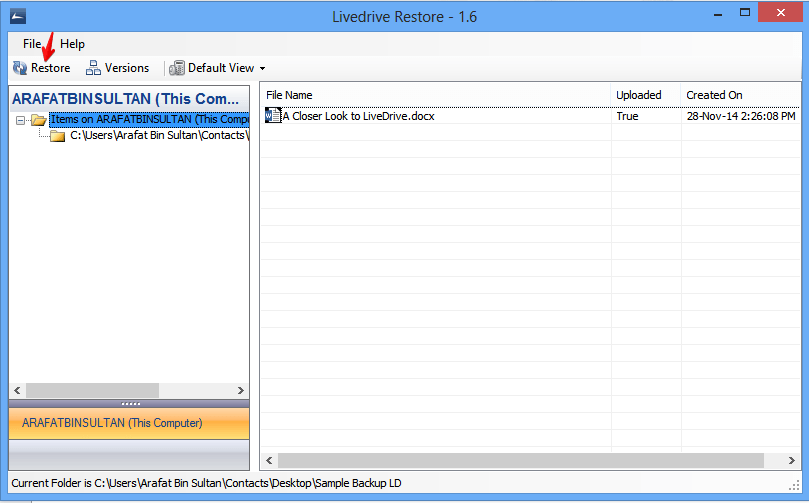
Select the file/folder and click ‘Restore’ button.
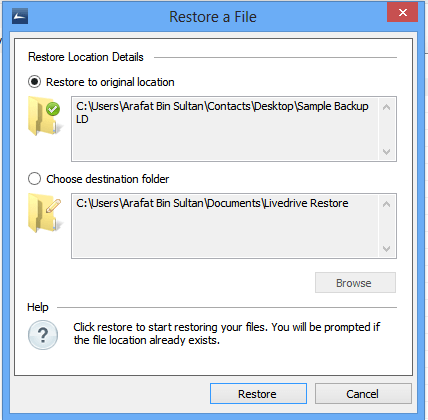
Confirm the restoration upon selecting the target location. You will get a notification when the process is complete.
Settings
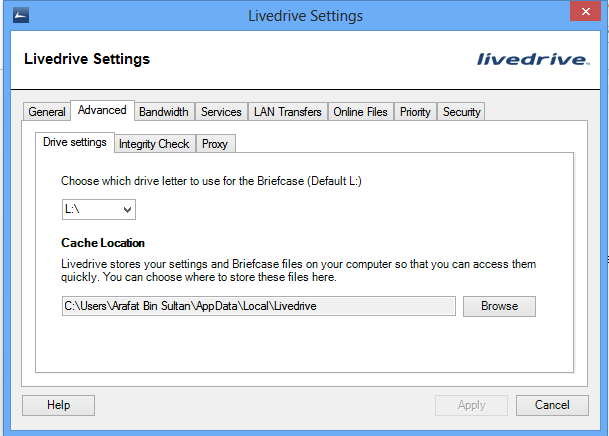
LiveDrive app’s settings window is loaded with tabs and options. The ‘General’ tab just shows the username, account type and software version. From here, you can check for app updates. The ‘Advanced’ section comes with network drive letter option for the briefcase, local file storage location customization, file integrity checking and proxy settings.
The ‘Bandwidth’ settings enables you to control and limit the upload and download speed. In the ‘Services’ area, you can enable/disable any LiveDrive service (backup and briefcase).
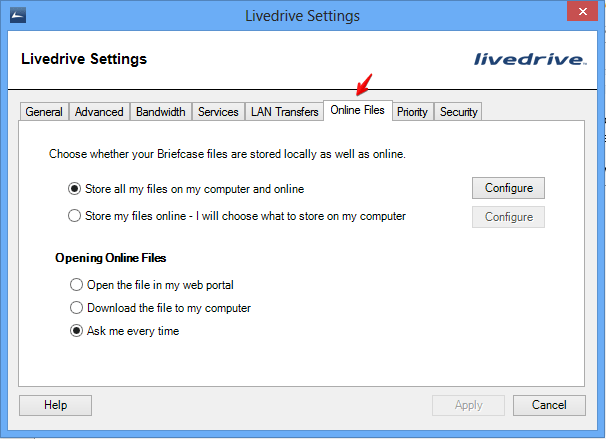
If you turn-on LAN transfer, files will be synchronized quickly among your locally connected computers. The ‘Online Files’ section lets you decide whether you are going to store files both locally and remotely.
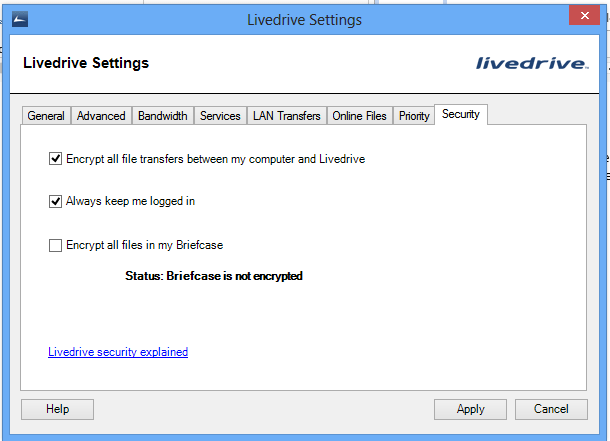
Using the ‘Priority’ option, you can predetermine which file-types will be synchronized first. And finally, from the ‘Security’ tab you can choose file encryption behavior and login policy.
Support
LiveDrive offers online technical support only. You can contact with their support team via email and the company promises to response within 24 hours.
The Bottom Line
LiveDrive tries to cover a range of user categories. If you are ready to spend some money to get a cloud drive/online backup service, LiveDrive can be worth to go with.
I hope you’ve enjoyed my efforts on this detailed article. What are you thinking about LiveDrive? Please share with us. Thanks.