Probably you’ve heard about Cintanotes. It’s a Windows based note taking app available in both installer and portable versions.
Cintanotes works both online and offline. So you can keep it synchronized on more than one device. I will tell you more details on Cintanotes. Before that, here I present its pros and cons.
Pros
- Lightweight
- Offers both installer and portable version
- Does more than just a basic note taker
- The Hot Key (kind of shortcut) and clipper features are great
- The search feature is powerful
Cons
- No image support on notes
- Text formatting tools lack font color customization
- Limited synchronization
- Natively available on Windows only
What People Say About Cintanotes?
Users like Cintanotes mainly for its fast performance, easy clipping and clean design. One person said that he is using Cintanotes for many years because of the text clipping feature. Another user says, the clipper saves the source address of the clipped text that helps much.
Some people also expressed their satisfaction with the pro version. They use it with Simplenote sync including other note taking features.
At the same time, I found some users who are expecting more from Cintanotes. They said that, screenshot and image support would add more value to the app.
Hands-On With Cintanotes
Cintanotes app is available in two forms. One version needs to be installed on computer, another is portable. Portable version can be carried by removable drives. Get your desired one from this official Cintanotes downloads page. I used the installer edition.
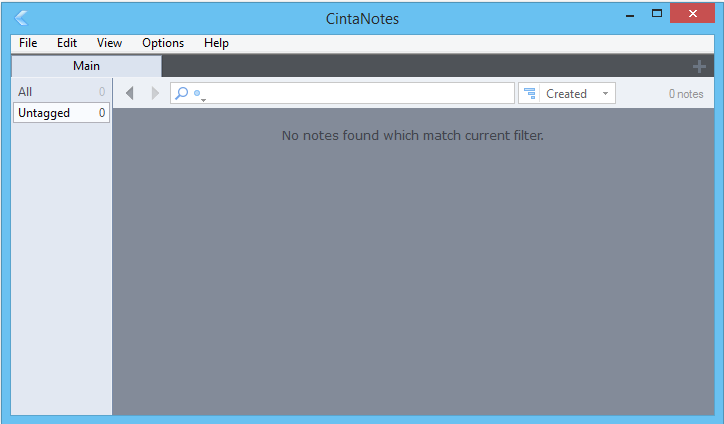
The program is small and light. It takes a few clicks to be ready for use. This is the first page of Cintanotes.
Dealing with Notes
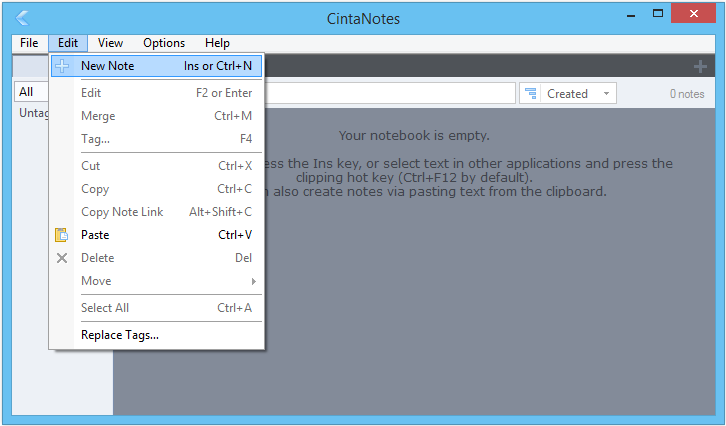
To add your first note, go to Edit menu and click on New Note. You can also use shortcuts to do it. All shortcuts are written beside the respective options.
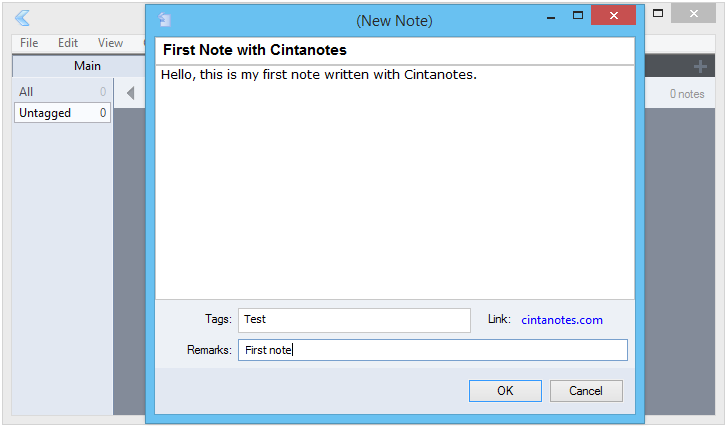
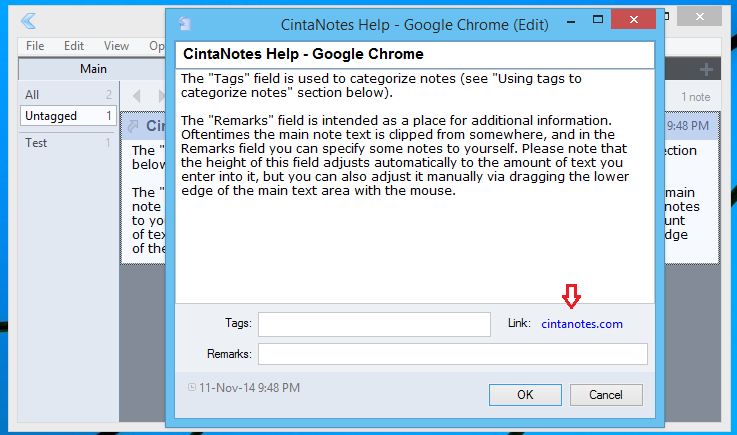
The note editor is a popup window with a simple interface. Enter the title, body text and fill-up other fields then click the Ok button. Your note will be saved.
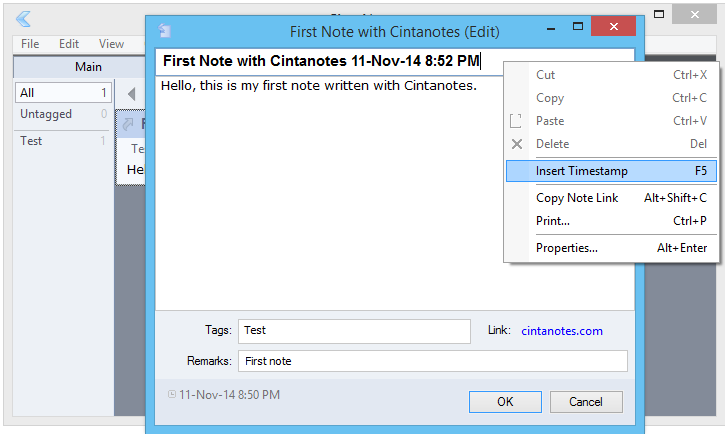
The title field does not have much options. Right clicking on the title brings a context menu.
From there you can visit link inserted in the note, see the note property, print note etc. The ‘Insert Timestamp’ feature adds the current time and date to the note.
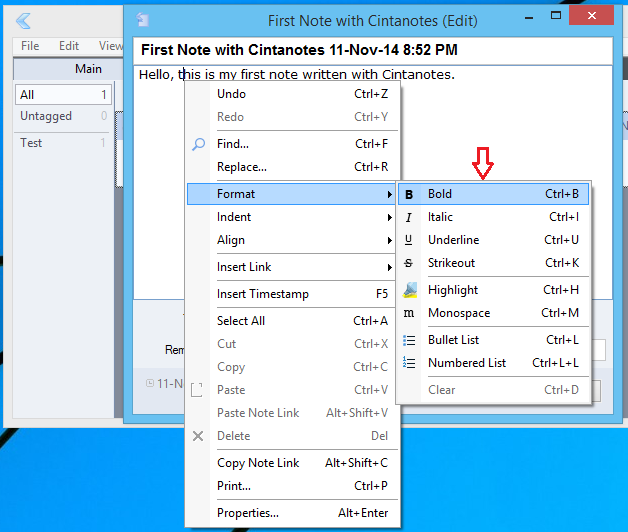
In the body field, there are more options to organize the note. Just right click to get them.
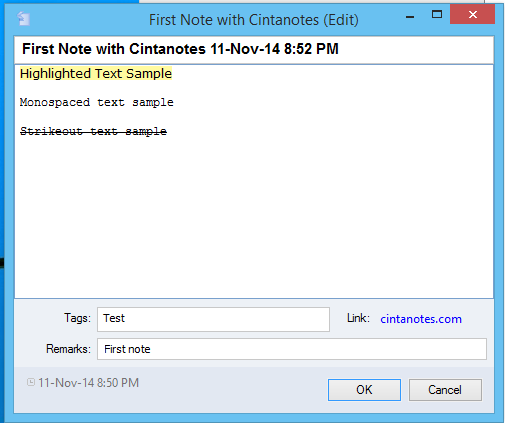
Cintanotes provides a few text formatting tools. It allows some basic functionalities like bold, italic, underline, strikeout, highlight, monospacing, bullet-numbered listing etc. The app doesn’t support pasting image on notes. You also can’t change font color in Cintanotes.
The Indent option will just add some blank space before the target line. The context menu also contains text alignment options.
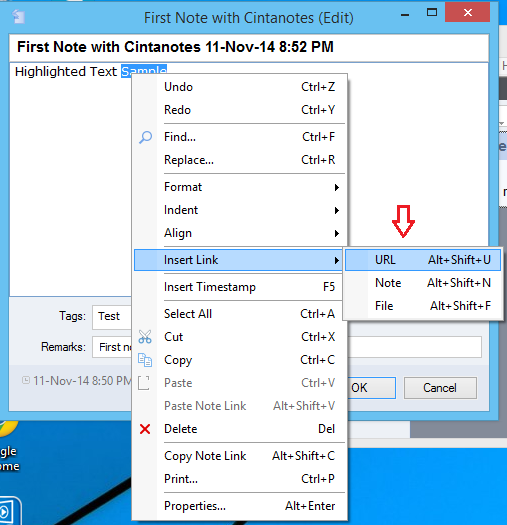
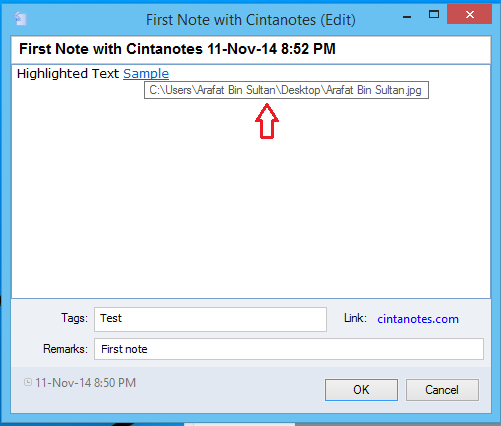
The Insert Link feature offers three linking alternatives. Here you can add a link to a web page, a note or a file. Adding a note as a link is a pro feature which can be tested with a 10-day trial license. Inserting a file is easy. Just locate the file on your computer. The text will get a hyperlink. Clicking on the hyperlinked text will open the linked file.
Adding a tag makes your note easily accessible. Pro Cintanotes allows making parent tag and thereafter sub tags under each parent tag. In a basic Cintanotes app, you will be able to insert individual tags only.
The idea of the Link section (next to Tags field) conforms with note clipping. Cintanotes has a clipping feature which helps to copy text from any other application. To use this feature, just select your desired text and press CTRL+F12 on the keyboard. A new note with the selected text will be appeared before you. Double click on the clip note to open it. If you clip text from a website, the respective URL will be added as the link. Again, if the clipped text is from a MS Word file, the document’s location will be embedded in clickable form in the link field. Given that, clipping option will work as long as the Cintanotes app running on your computer.
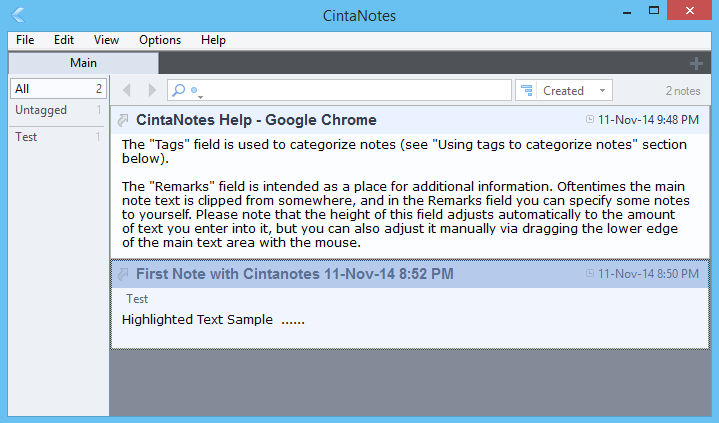
You also can add some remarks to briefly describe the note. Under the Remarks field, the note creation and last edit dates are displayed. And finally, when you have some notes, the Cintanotes main window looks like this.
Here you will find accessibility and other notes options. There are filters on the left column. By default, notes are arranged by tags. The untagged notes go into ‘Untagged’ category.
There are two arrow-like buttons next to the left column. Clicking those buttons switches between tags.
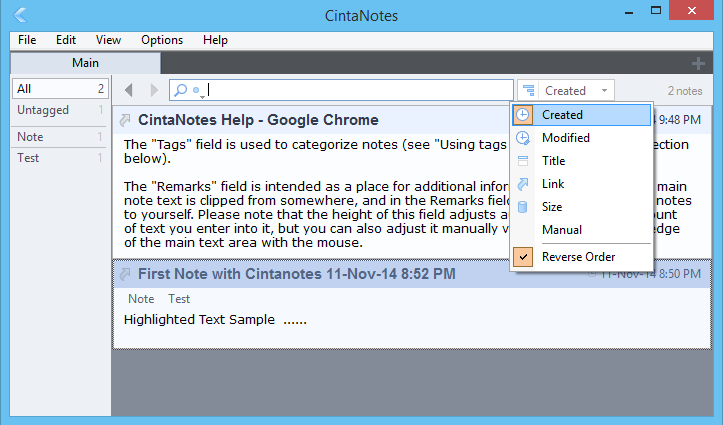
Cintanotes doesn’t not show notes in just a tag-filtered manner, but also it has a sorting mechanism to list notes as dates, titles, links etc.
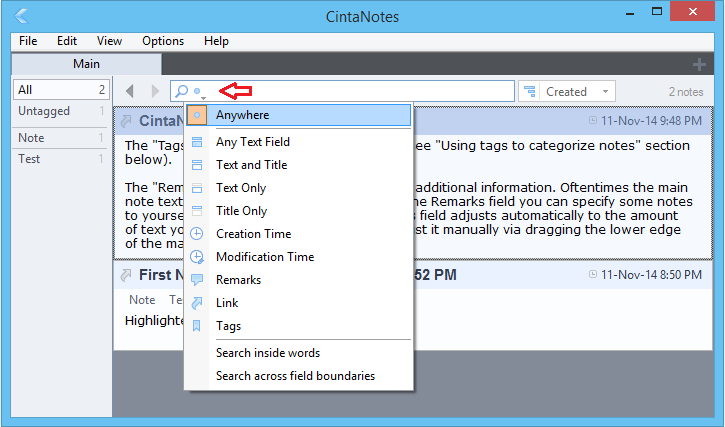
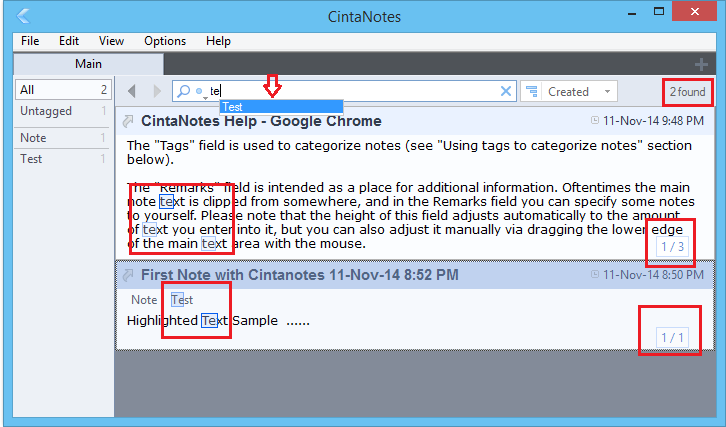
Cintanotes has an extensive search feature.
It shows search suggestions and results as you type inside the box.
Making a Section
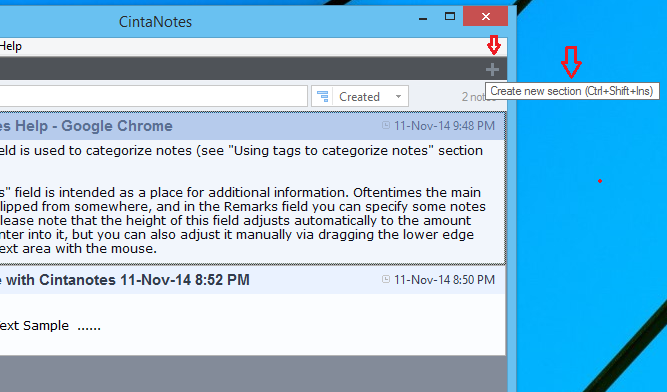
On the top right corner, there is a ‘Plus’ sign to add a new section. Click that button to make a new section.
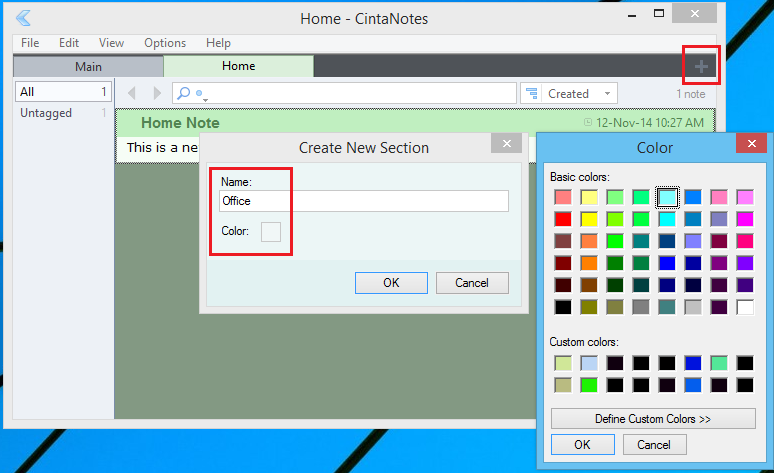
This feature helps to manage notes separately for different purposes. For an example, you may create individual sections for home notes, office notes and so on.
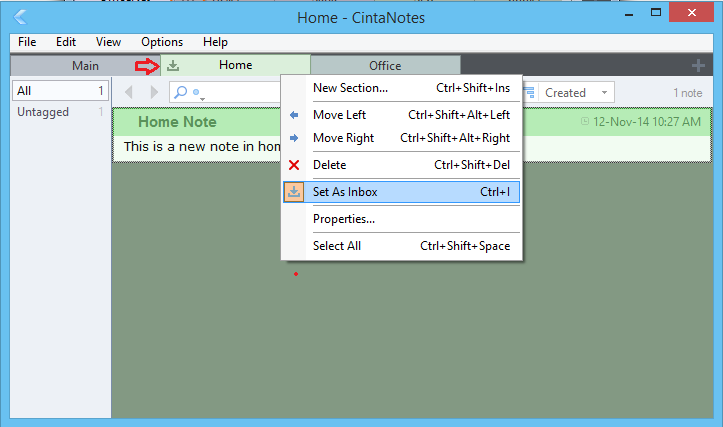
You can assign custom color for each section’s interface. However, the basic (free) version of Cintanotes allows adding up to three sections in a notebook. Right clicking on the section shows its options.
If you set a section as ‘Inbox’, then the clipped texts (CTRL+F12) go inside that section by default.
Creating a Notebook
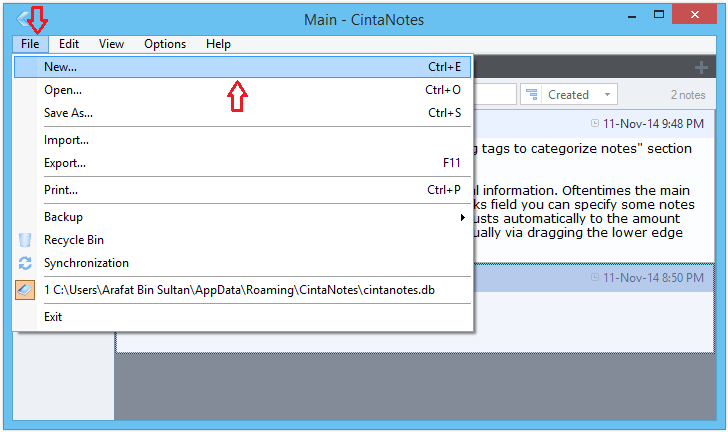
When the Cintanotes app get installed, it automatically creates the first notebook. It’s a data file with .db extension. You also can create notebooks whenever you need. To make a new notebook, go to ‘File’ menu and select ‘New’, then save the ‘.db’ file.
Later you can open those notebooks using the ‘Open’ option inside ‘File’ menu. There you will get another option ‘Save As’ to make a copy of your notebook.
Importing and Exporting
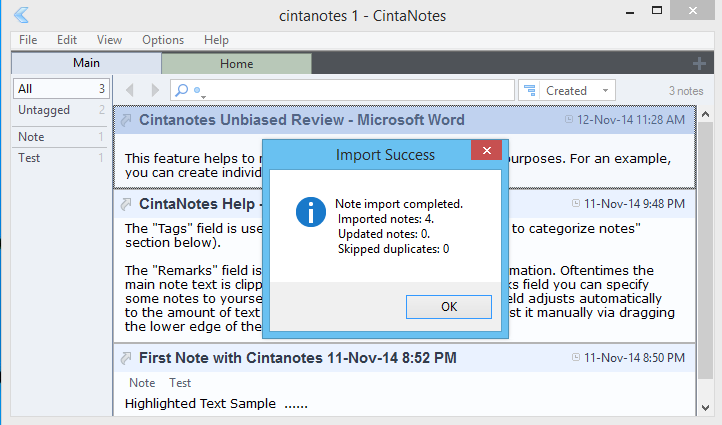
Cintanotes supports importing notes from other notebooks, xml files etc. From ‘File’ menu, you can import notes just by locating the target file from where the notes will be imported.
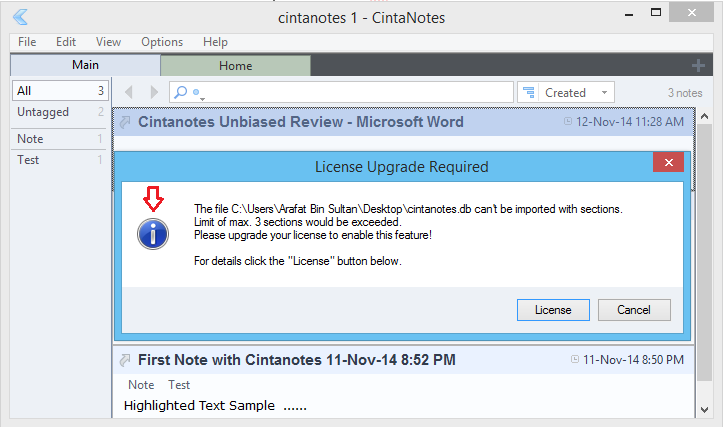
While importing, Cintanotes skips duplicate notes. It also take into account that how many sections inside the importer and to be imported notebooks/files. Since the basic version supports only three sections, so you cannot make a successful import which would result exceeding that number.
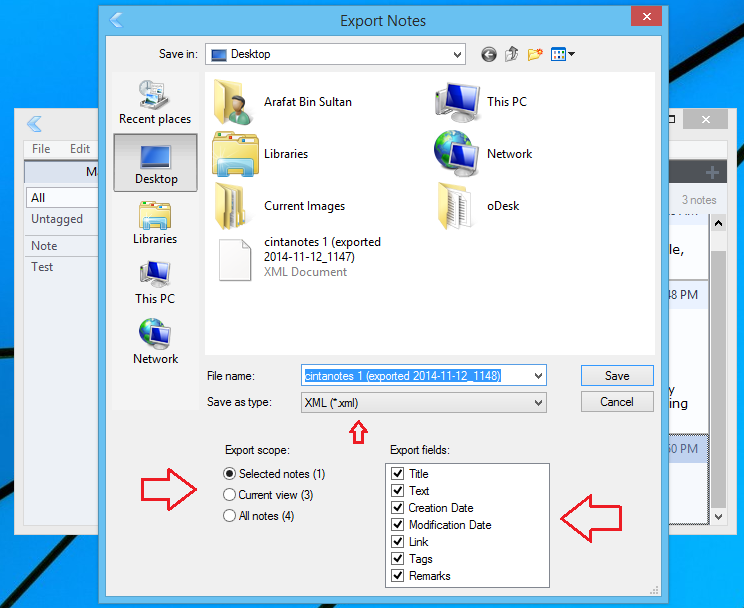
Exporting notes can help mobilizing stuffs. Use the ‘Export’ option in ‘File’ menu to export notes as text or xml documents.
Backup and Sync
You can keep backups of your notes using the ‘Backup’ option in ‘File’ menu. The app automatically keeps backups in hourly, daily and weekly basis. Backup frequency is customizable.
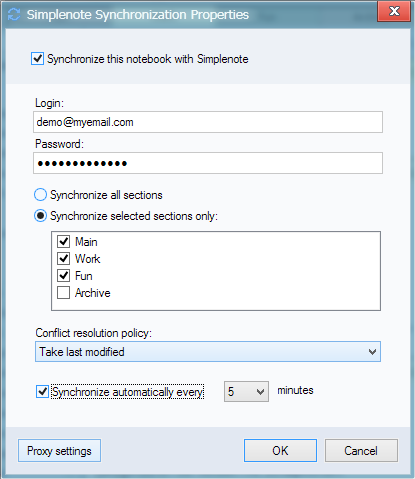
If you have a pro license, you can synchronize Cintanotes with Simplenote’s online service to access it from other devices.
Settings
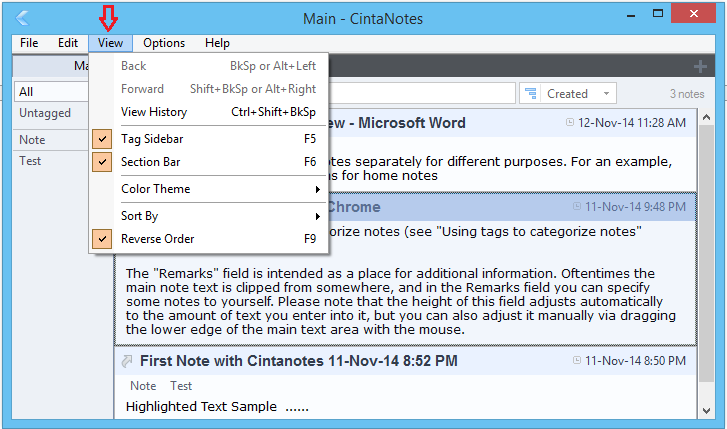
Cintanotes app specific settings can be found in the ‘View’ and ‘Options’ menu. The view menu deals with the app’s main window.
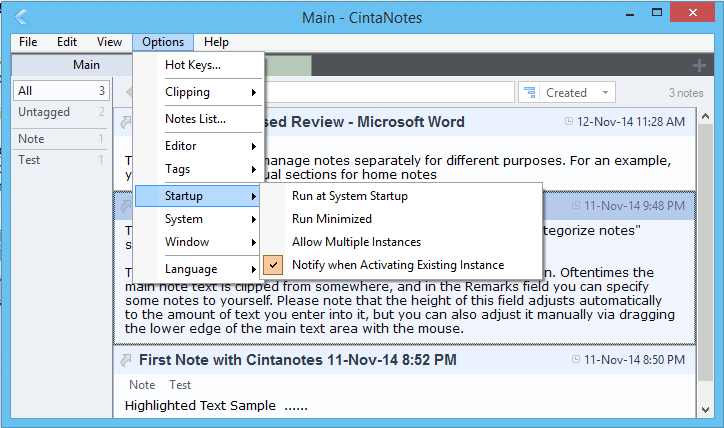
The ‘Options’ menu has some more advanced settings for customizing Hot Keys, clipping, startup policy and so on.
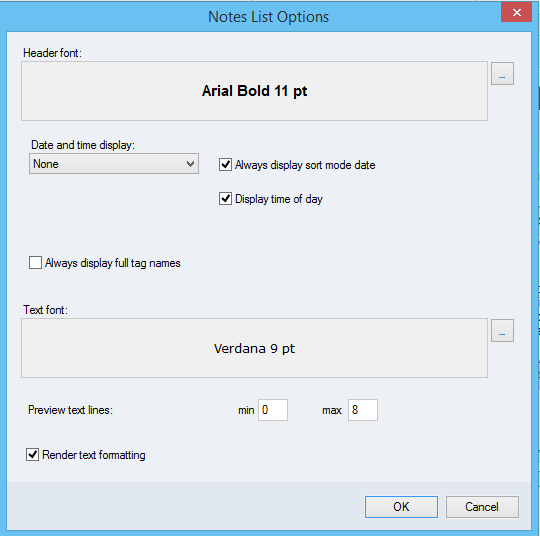
Select ‘Notes List’ to change default note fonts.
Finally, the help menu shows ways to visit Cintanotes websites, license the app, installing updates and viewing app info.
I used Cintanotes 2.8.2 basic (free) version to write this review. The app has Pro and Lifetime Pro versions. The Pro edition costs $39 (One year update. Renewable) and the Lifetime Pro charges $119. The latter one provides priority technical support and unlimited updates. Rest of the features are same for both. As I already mentioned, paid Cintanotes comes with some more advanced features. Please find the full feature list here. If you want to learn more details about its functionalities, you may like to visit this official documentation.
The Bottom Line
While Cintanotes offer a fast and intuitive note taking experience, its lack of image is a point to notice. But if you are okay with no image and no font color, Cintanotes can suit with you. Given that, the app’s sync ability is also limited.
Did you use Cintanotes? How was your experience? Please share with us via comment. Thanks.


