
OneNote is a widely popular note taking tool from Microsoft. The program comes with MS Office suite, but still you can get it as a standalone application.
The note taking service also offers a web version. OneNote has dedicated apps for Windows (PC and Mobile), Mac, iPhone, iPad and Android.
OneNote 2013 is now free. Visit this official link to get the app. If you already have Microsoft Office installed on your computer, probably you also have OneNote inside it. I’ve used OneNote 2013 on my Windows 8.1 PC. I’ll share my experience with this. Before going details, let’s see its pros and cons.
Pros
- OneNote is free, more advanced features are available with Office 365 subscription
- The app has a rich set of text formatting, OCR, drawing and attachment tools
- Its password protection helps to enhance privacy
- OneNote’s unique tagging ability sets the app apart from others in its kind
Cons
- In my opinion, OneNote should have a native reminder feature that can work without Outlook or add-in
What People Say About OneNote?
OneNote is greatly discussed among its stakeholders. People like its formatting tools, multimedia supports, flexibility etc. Its tabbed interface is also found to be a good point. A review by Lifehacker describes OneNote as a better digital notebook while comparing it with Evernote. However, still some users urge for a clipper that can save the total web page with all links in editable form. I also found a few people who want a native reminder option.
If you’re acquainted with Evernote you can read our OneNote vs Evernote Web App Comparison to see how it differ from OneNote in regard to their web interfaces.
Overview
Now I’m going to review most of the core features of OneNote 2013. Since this part is quite massive I would like to present a table of contents here for easy navigation.
[table]Table of Contents,
Using OneNote 2013 on Windows,Writing a Note
Using Tags,Creating a Tag
Creating a To-Do List with Tag,Searching Tags
Managing Space for Note Contents,Inserting Contents
Changing the Page Template,Adding a Reminder
Drawing on OneNote,Seeing the History
Reviewing Notes on OneNote,Password Protection
Sharing Notes,Taking a Linked Note
View Options,Send to OneNote[/table]
Using OneNote 2013 on Windows
Once you have installed OneNote, you can open it. For the first time, you will see some introductory notes and tips.
To write and store your notes, create your first notebook. Go to file menu, select ‘New’.
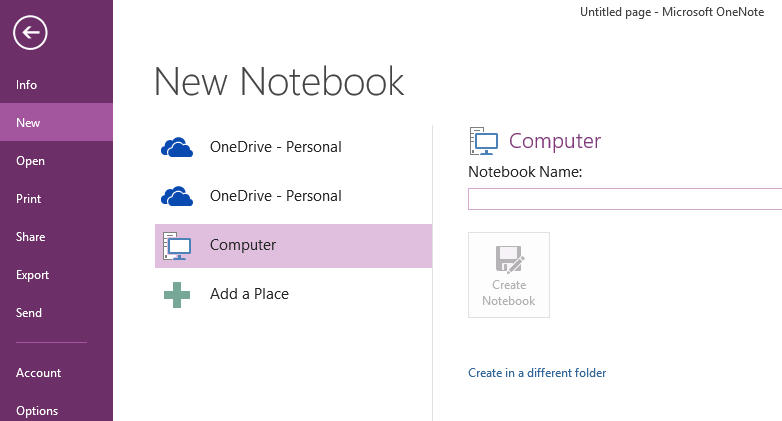
Give a name and save your notebook. Remember, here you can store your notebook on your local storage or OneDrive cloud. If you make a notebook on OneDrive, it will be accessible from other devices via cloud.
Writing a Note
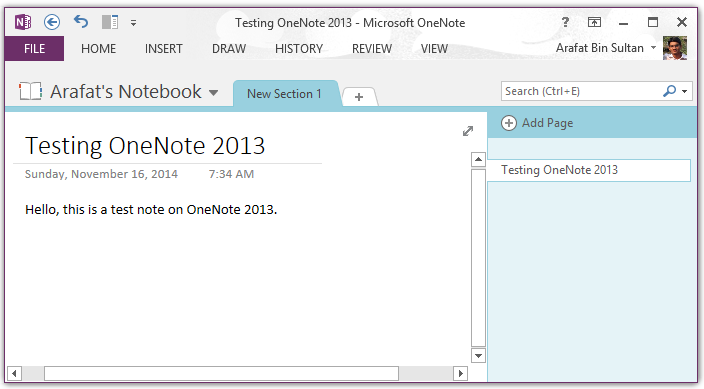
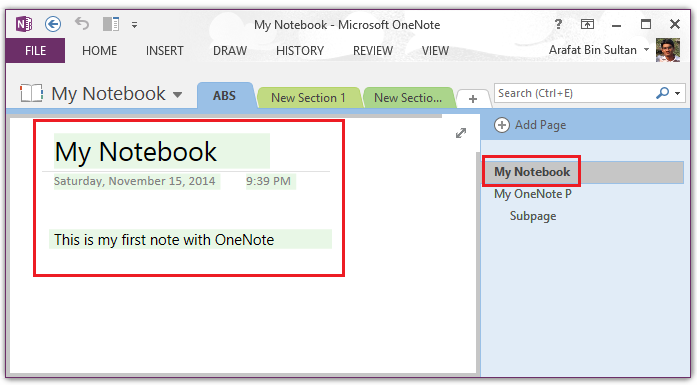
Creating a new notebook will open a note composer. There is a title field. You will see the current date and time below the title line.
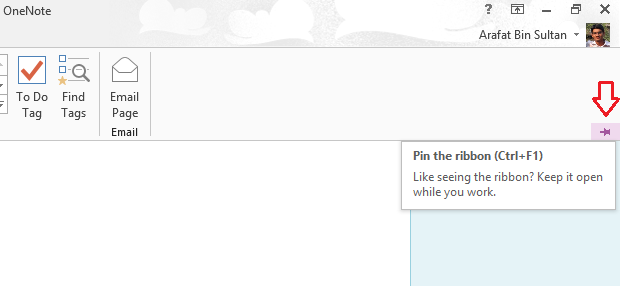
By default, I got the ribbon minimized. If you like to see the ribbon, you can pin it to keep open.
You can type anywhere of the note interface. Texts are written inside individual boxes so that their position can be altered. The text boxes are resizable. If you wish to write a big paragraph, the box will get resized automatically.
So far in my experience, OneNote offers the richest set of text formatting tools in its kind. I also used Evernote desktop app, but in my view, OneNote’s formatting tools are much better.

If you select some texts, the basic formatting options pop-up.
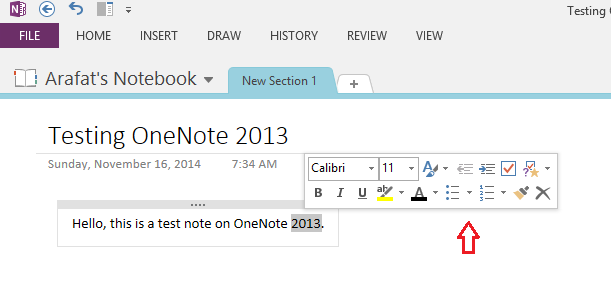
OneNote’s formatting tools are almost similar to the Office Word. Here you can get a range of fonts, bullets, headings and much more.
You can create a new section on your note in a single click.
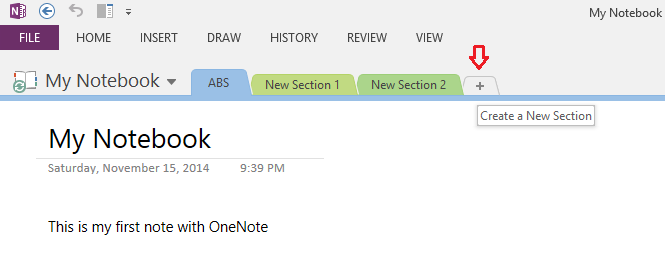
A new section is something like a tab. It helps to insert additional branches of note contents. OneNote also lets you add a new page.
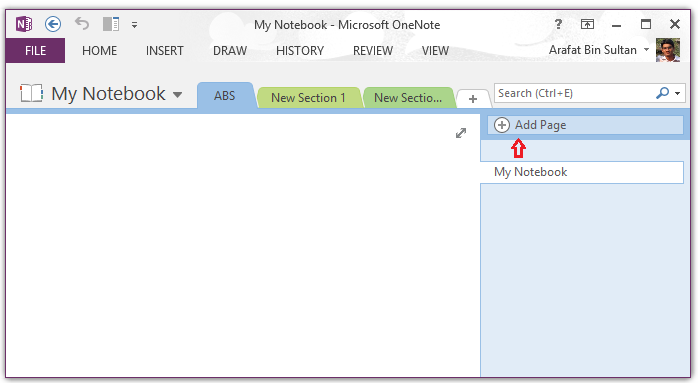
You can add a new page as a subpage to another page. Subpage titles appear with slightly right alignment just under its parent page. New sections also can be added to pages.
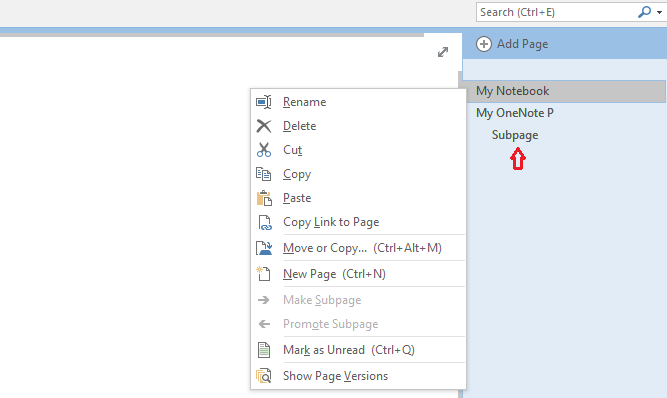
You can cut/copy/move pages from the above context menu. Marking a page as ‘Unread’ will mark its all contents. The page title section gets a bold look at the right.
Later you can mark the page as ‘Read’ using the context menu. Or simply open the page and double click the marked contents. It will get ‘Read’ status automatically.
Using Tags
If you used other note taking apps or even blogs, probably you are familiar with tags- somewhat a way to categorize/group content archives. But in OneNote, tags are not used in that flavor. Here you will find a broader application of tags. OneNote has notebooks, sections and pages to organize/categorize contents. This note taker does not use tags to simply grouping notes, rather OneNote uses tags to mark individual stuffs like paragraphs, sentences headings, images etc. You can place a tag anywhere on a note, but it should be with a supported content to be discoverable. To add a tag inside a note, right click on the target content and click the small tag button.
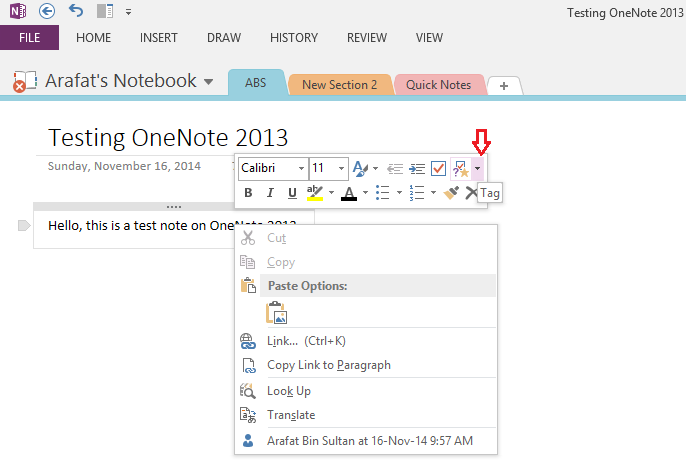
A list of predefined tags will appear. You can select a tag from here. New tags also can be created (we’ll see it later in this article).

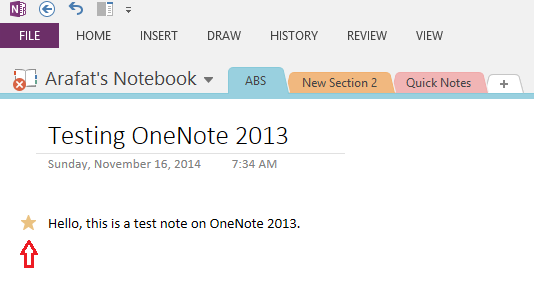
Suppose, we want to use the ‘Important’ tag with the target sentence. Simply select it from the list and the tag’s symbol (Star mark) added with the content.
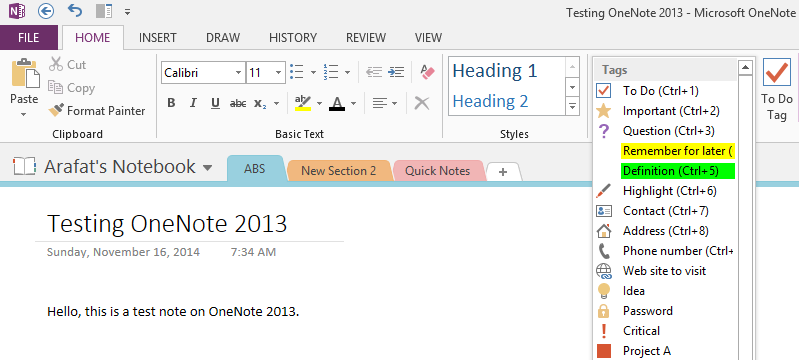
The Tag section is located in the ‘Home’ tab of the upper ribbon of OneNote window. You can also add tags from there. To do it, at first place the cursor on the target content (just click), then go to ‘Home’ of the upper ribbon, and click on ‘More’ button inside ‘Tags’.
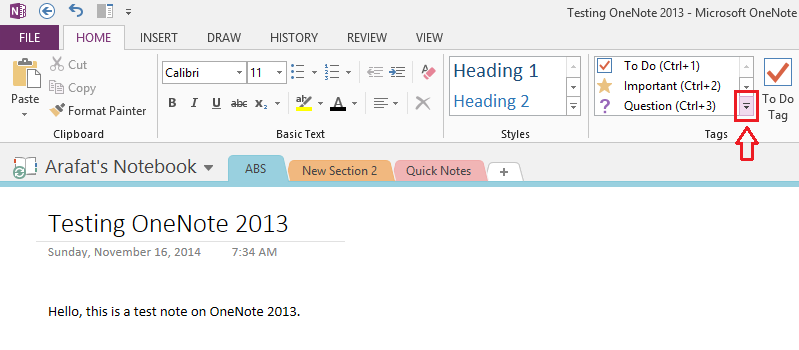
A list will appear. Select a tag from there.
Creating a Tag
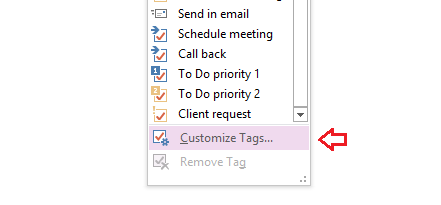
As I promised earlier, now we will see how to create a tag. It’s very easy. At first select ‘Customize Tags…’ from the built-in tag list.
A new mini window will popup.
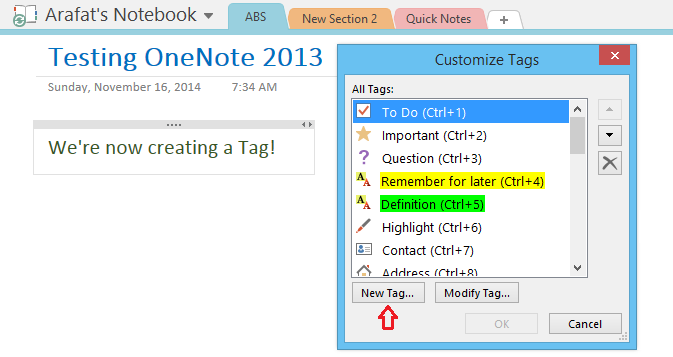
From here, you can create a new tag or modify an existing tag. We’ll create a new tag by clicking the ‘New Tag…’ button.
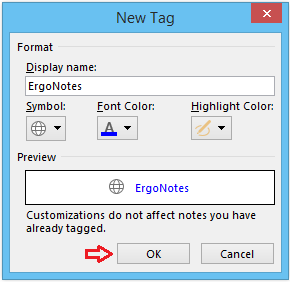
Write the tag name, select an icon, define the font color and highlight color. It will show a preview. Click the ‘OK’ button when complete.
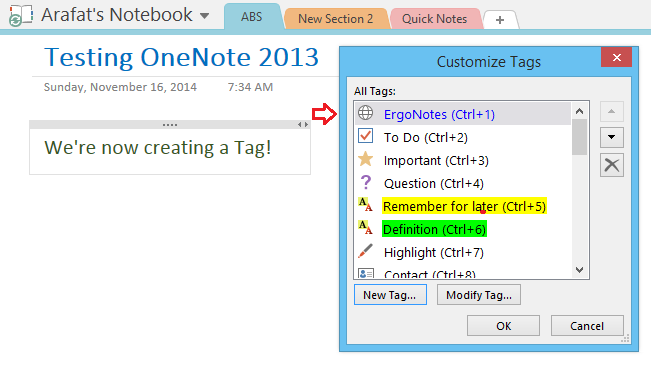
Our new tag has been created and added to the list.
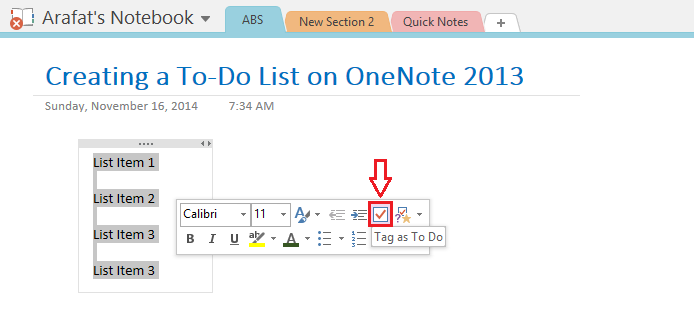
Creating a To-Do List with Tag
OneNote offers a great way to create and manage a to-do list. You can make a checklist using ‘To Do’ tags. At first write down your list items. Now select them all and click the ‘Tag as To Do’ option from the mini popup window.
Alternatively, you can do it from the ribbon as well.
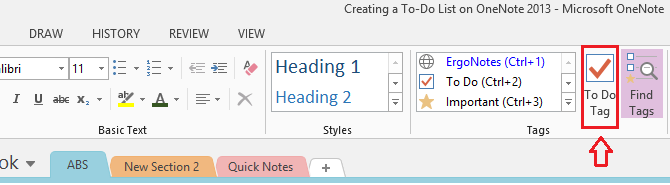
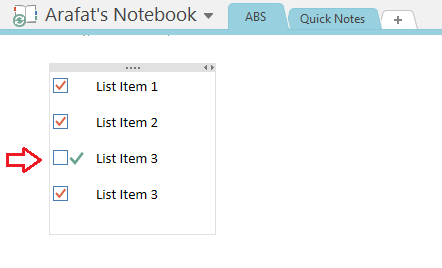
Whatever method you use, here is the To Do list.
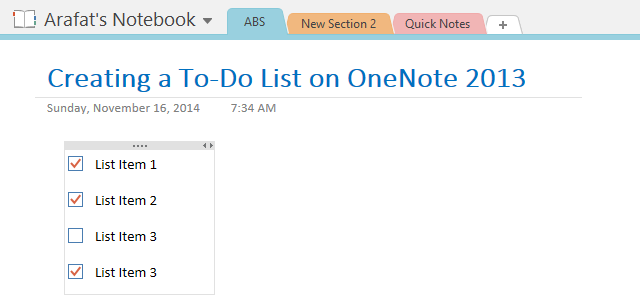
You can check items as usual.
Searching Tags
Tags are applied to make contents more discoverable. You can search tagged contents using ‘Find Tags’ tool located at the right corner of the upper ribbon.

Click the ‘Find Tags’ button to open it.
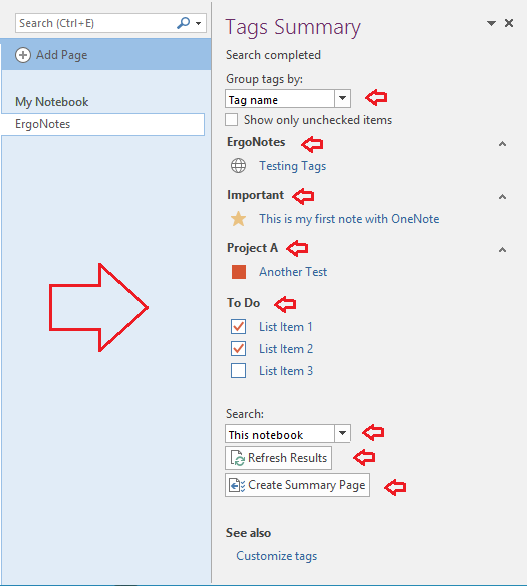
So, the Tags Summary opens here. You can group the search result by tag name, section, title, text etc. there is another filter for to do lists. If you select ‘Show only unchecked items’, then the tag search result will show only unchecked items of to do lists. Here, the search views two tag results- ‘Important’ and ‘To Do’. The respective contents are also shown. Clicking on them will take to the note’s relevant part. At the bottom, we see the search field filter. We can search in the current notebook merely. Or if we want, we can also search in sections, pages or through the all notebooks. Every time we change a variable, we should refresh results.
To get all tags in one place, you can create a summary page. Later you can visit the tagged item directly from the summary page. Click ‘Create Summary Page’ from the bottom of the tag search section.
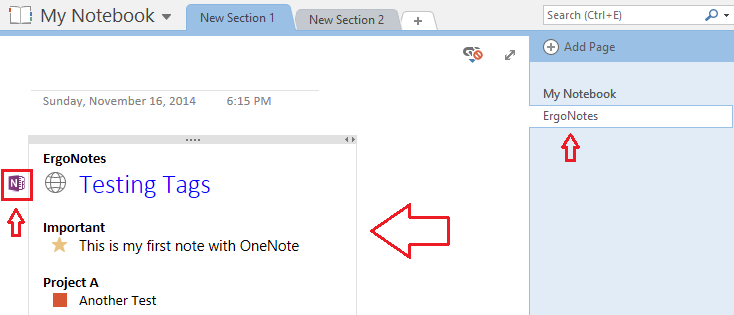
A summary page gets all tag headings and links to these contents. If you hover mouse on the summary page’s content box, a small OneNote logo appears at the left side for each tag headline. Clicking the logo takes you to the respective tagged content.
Managing Space for Note Contents
If your current note composer page gets filled with contents and still you need to add something on the same page, then you can increase the page size to accommodate additional contents. Use the ‘Insert Space’ button from ‘Insert’ tab.
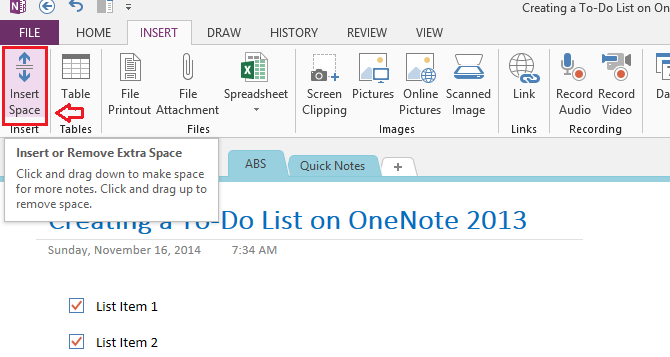
At first click the above marked button and then bring the mouse pointer on your note composer. Click and hold the mouse, then if you drag it downward, the page space will increase. Alternatively, here if you drag the pointer upward, the page space will be reduced.
Inserting Contents
OneNote supports inserting a range of contents types. You can put a table, spreadsheet, image, file printout (image version), file attachment, screen clipping (screenshot) audio-video record, scanned image, link, date-time, symbol, equation etc. OneNote can recognize texts from images.

Changing the Page Template
The Insert tab lets you change OneNote page template. Click the ‘Page Template’ section to open template menu.
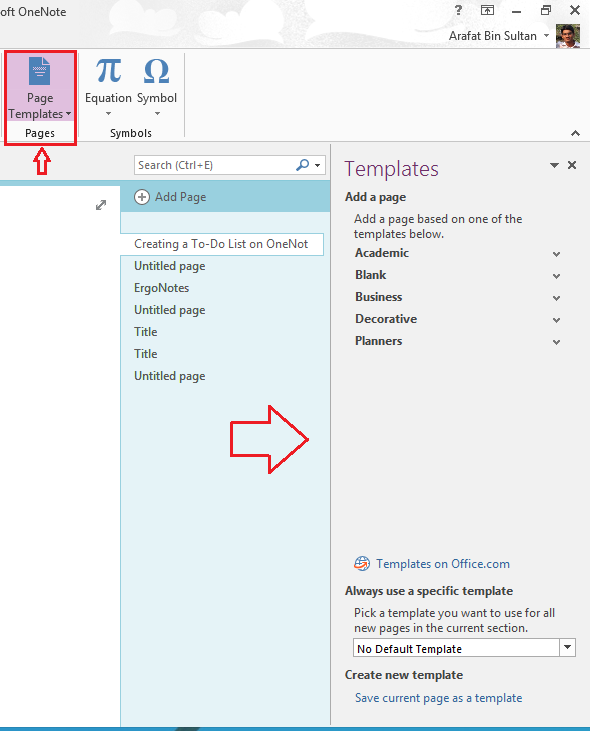
From here, you can set a customized template for your notes.
Adding a Reminder
OneNote 2013 does not have a native feature to add a reminder and set an alarm. But it provides this functionality from Outlook. If you have Microsoft Office in your computer, probably you also have Outlook. So, don’t worry, you can set a reminder on OneNote. Otherwise, you can get this benefit by installing add-ins like OneNote Gem Monitor. Let’s assume that you already have Outlook installed on your machine. To set a reminder for a specific note content, right click or select the item. A context menu along with a mini formatting bar will appear.
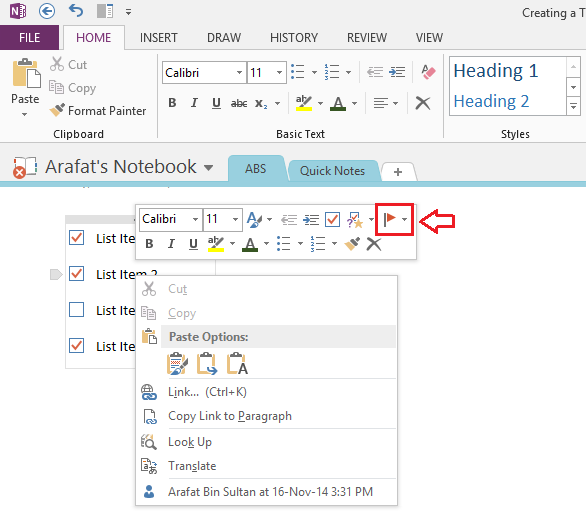
There you will see a red flag (Outlook Tasks). Click on the flag. A list will be shown.
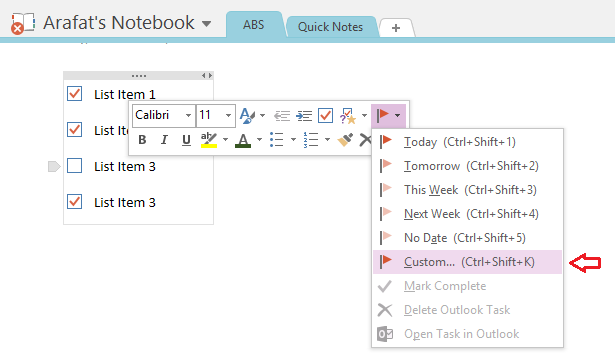
Click ‘Custom…’ option. A new Outlook window will popup.
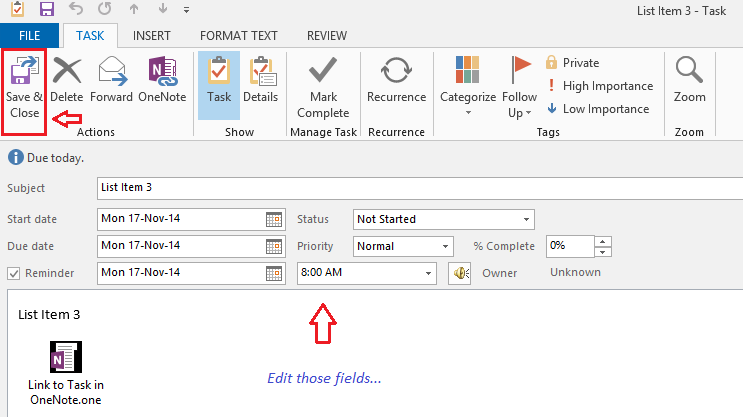
Edit the above fields and check the reminder box if you want to set an alarm. Click ‘Save & Close’ button to set the reminder. The item with reminder will have a flag beside that.
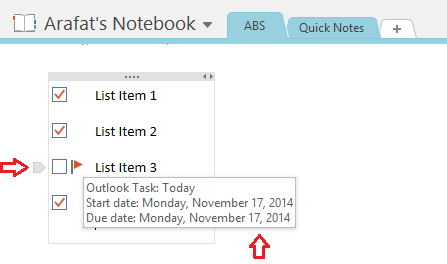
Click on the flag to mark it as done anytime.
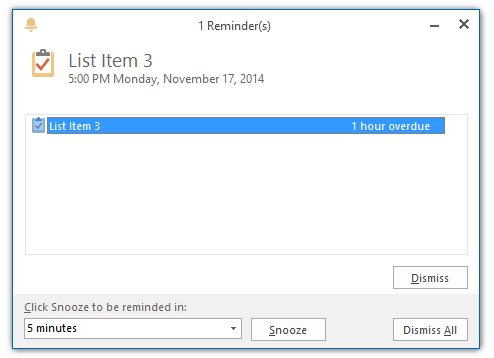
And this is how the reminder/alarm/notification looks like.
Drawing on OneNote
OneNote offers a huge set of drawing tools on board. You can write using the drawing tools (handwriting) and later convert that into text. Here is just a sample and screenshot of the drawing section.
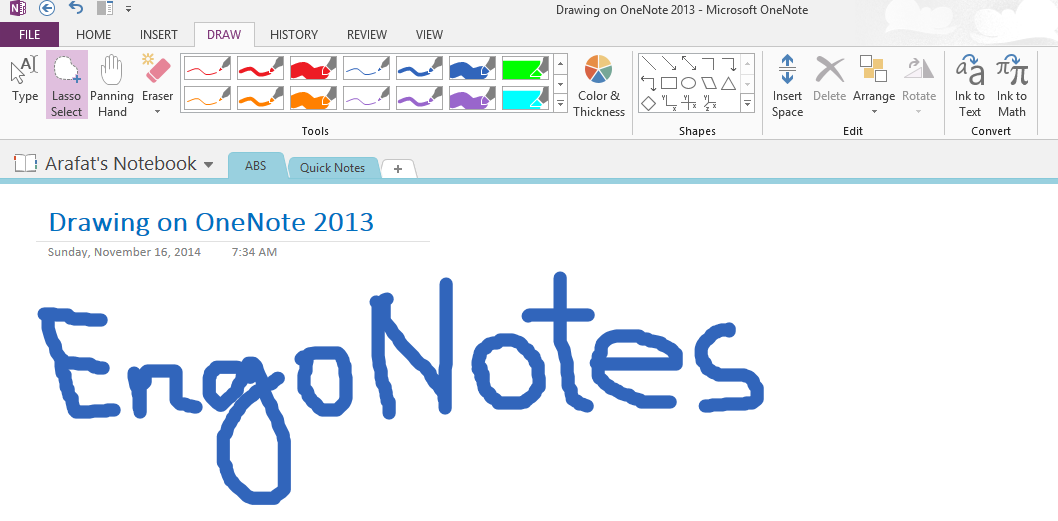
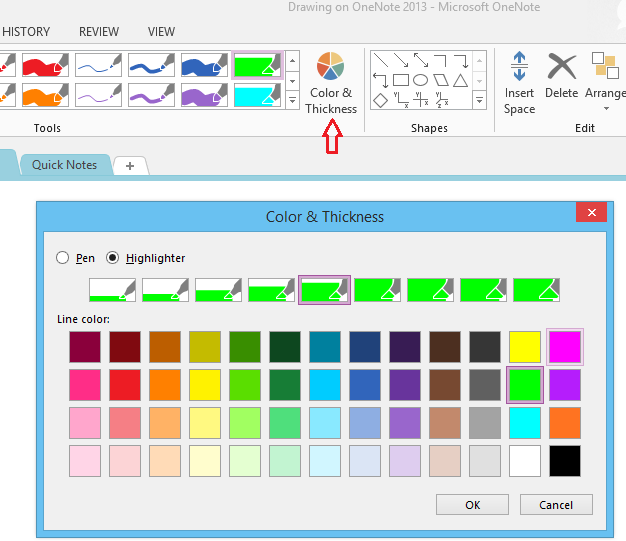
It has a range of readymade pens and highlighters.
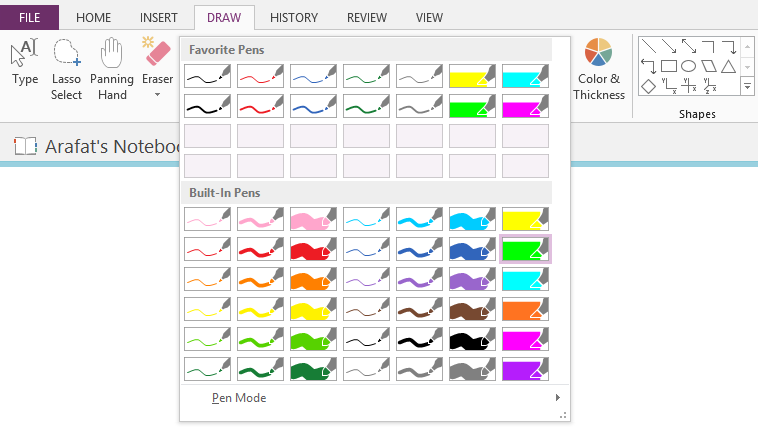
You can customize them using the ‘Color & Thickness’ option.
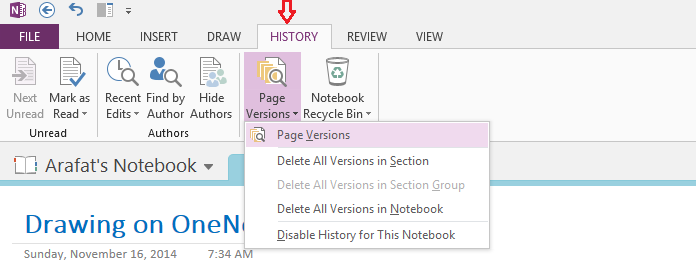
Seeing the History
OneNote keeps track on your note editing and you can see the history. Click the ‘History’ tab to take a look on recent edits, page versions, recycle bin etc. You can check the history by authors as well.
Reviewing Notes on OneNote
You can evaluate your contents on OneNote. The ‘Review’ tab has a ‘Spelling’ option at the beginning. Click there to check your spelling. Here is an example.
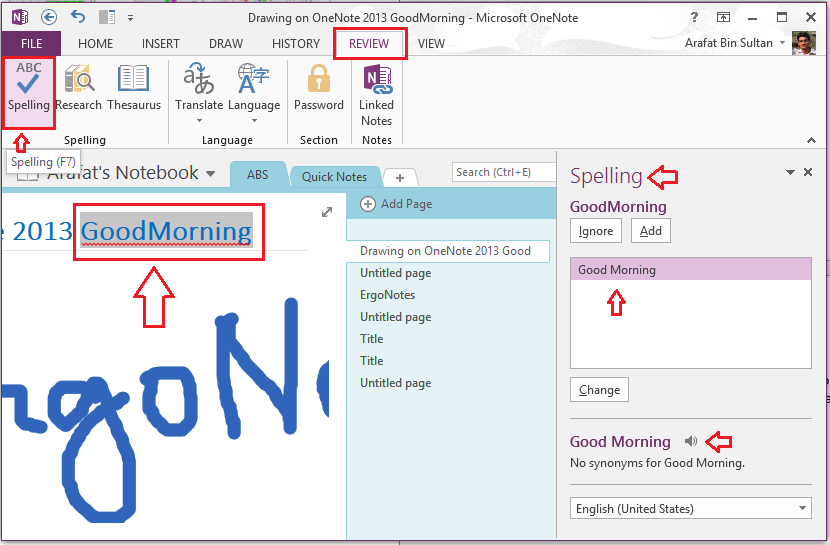
OneNote checks your spelling and suggests corrections if it finds any error. You also can listen the suggested pronunciation. Along with spelling, OneNote has other review tools as well.

It also has translator to change the language of your note contents.
Password Protection
In OneNote, we can protect a section with the ‘Password’ option inside ‘Review’ tab.
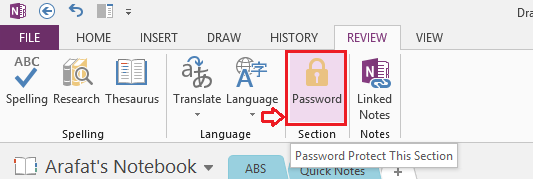
Click the Password button. A sidebar with the next steps will appear.
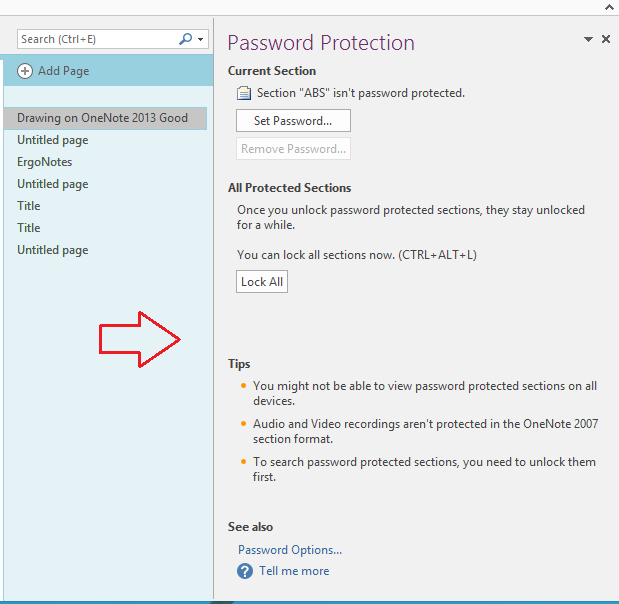
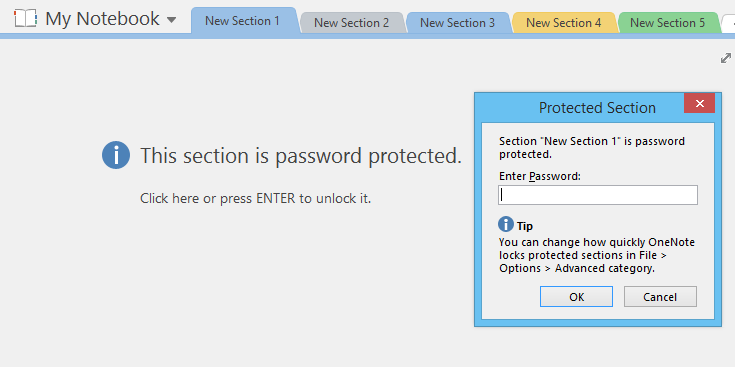
Set your desired password and lock the sections. A password protected section looks like this.
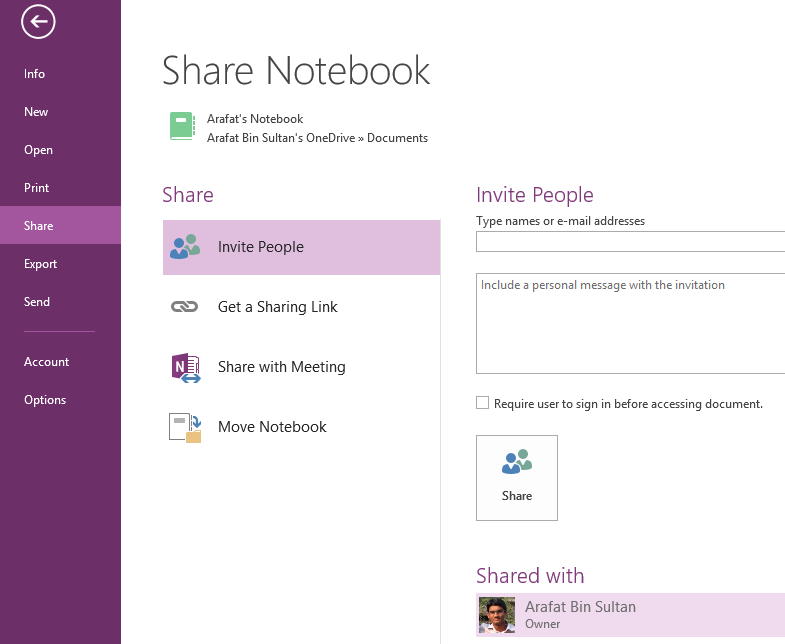
Sharing Notes
OneNote offers several ways to share notes with others. The File menu has a ‘Share’ section to manage notes collaboration.
In the Home tab, there is an option called ‘Email Page’ (at the right corner) which can send a note to someone via email.
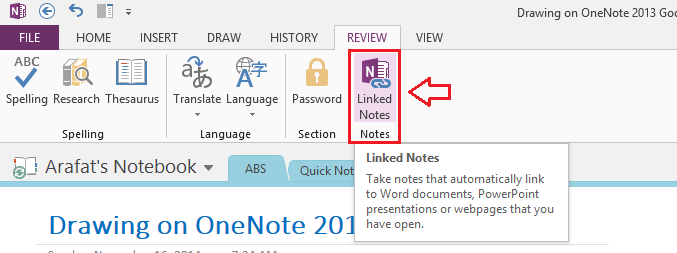
Taking a Linked Note
OneNote lets take a linked note which will link to an open MS Word file, IE web page or PowerPoint presentation. Click the ‘Linked Notes’ option and a new docked OneNote window will appear. If you have any of the above mentioned supported applications open (beside the docked OneNote window), as you take notes on the docked window, those will get links to the open contents of the supported app. Linked note support can be extended by using add-ins on non-IE browsers too.
View Options
You can choose the appearance style of OneNote from the ‘View’ section.

Send to OneNote
When you open OneNote, you may notice, another popup comes called ‘Send to OneNote’.
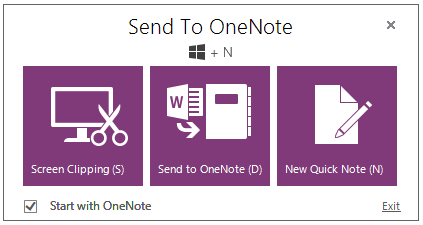
Use it to take quick notes or screen clipping.
The Bottom Line
Microsoft OneNote offers tons of features and options to take and manage notes. You can utilize its power for your personal and business purposes to live organized.
I hope you’ve enjoyed this effort to share my OneNote Windows App experience. In fact it’s too hard to put in one article. However, I tried to cover most. Please share your feelings about the app via comments. Thank you.