Web based note taking service Beyondpad has a unique way of storing, organizing and presenting your personal data. Let’s take a closer look at it.
Before going details, I just wish to present the pros and cons of the tool.
Pros
- Beyondpad offers so many features and option to make an informative note
- It’s smooth and responsive.
- The Trackers, Boards and Tag linking features can be used to stay more organized
Cons
- At some points, Beyondpad may seem to be complex
- The tool does not offer multimedia support so far
- Text formatting tools could offer more
What People Say About Beyondpad?
I explored to know the feelings of other people regarding Beyondpad. A user described the tool as ‘brilliant’. Another person reviewed that the service is smart, beautiful, creative and simple. Regarding the Boards, Lists and other features, a forum member commented that Beyondpad is something like ‘productive Pinterest’.
However, some of them found stability issues with the note taking service. The app author also recognized it and he assured to address the matter.
Hands-on With Beyondpad
Visit Beyondpad.com to use the service and sign up for an account.
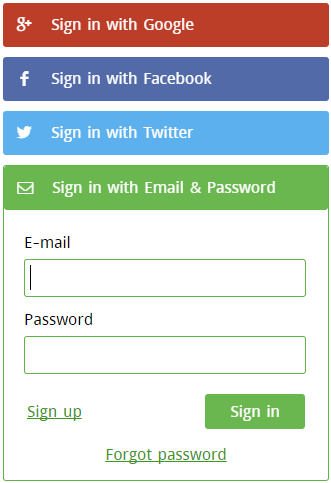
You can also sign in with your existing Google, Facebook or Twitter account.
Signing up requires only an email address and password. Pressing the Green ‘Sign up’ button will take you to the dashboard right away.
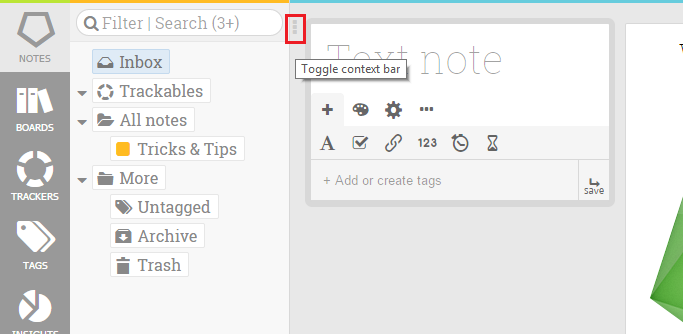
Here is a number of sample notes. The notes arrangement is grid style. You can further change the grid layout to tile or row interface. To do it, press the three-dot button found upper left side of the new note editor box.
A new ribbon will be appeared on the top of the dashboard.
Change your layout from this page. This ribbon will also help you to perform some other actions like bulk marking-unmarking of notes, editing tags, changing color, moving notes between folders and viewing notes according to status.
Writing a Note
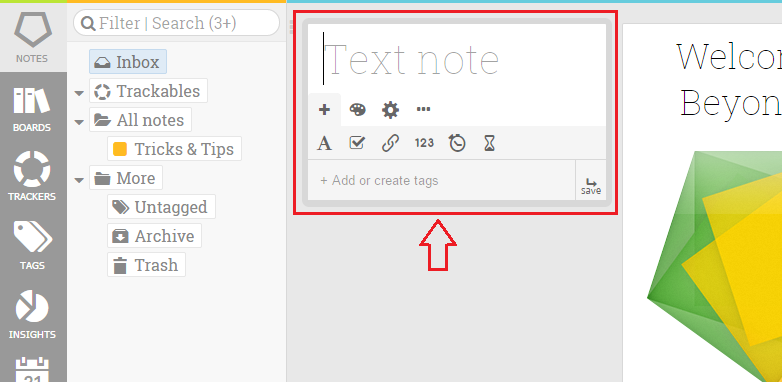
To create a note with Beyondpad, use its note maker. You will see a box with ‘Text note’ written inside.
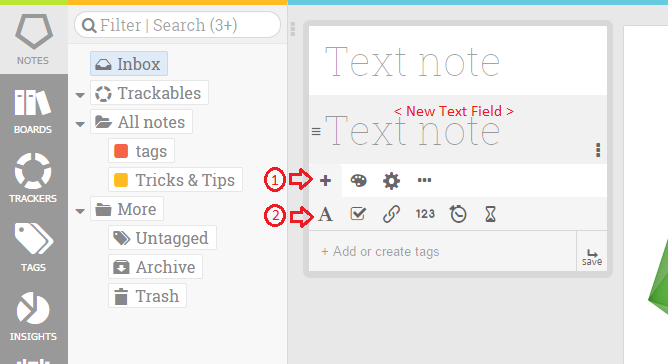
Add your note contents inside that box. By default, Beyondpad provides a single field to add text. More fields can be added by clicking ‘Add new item’ (the Plus sign on the left bottom of the text editor) > ‘Text block’ (the ‘A’ button).
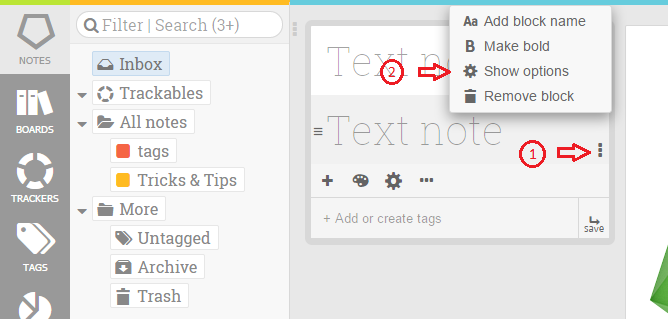
Each block’s texts can be formatted independently. But inside an individual block, you cannot format texts separately. That means, it does not allow to select-&-format few words separately from a total paragraph. To get text formatting options, place the mouse cursor inside a text block and click the three-dot button appeared on the box’s bottom right corner.
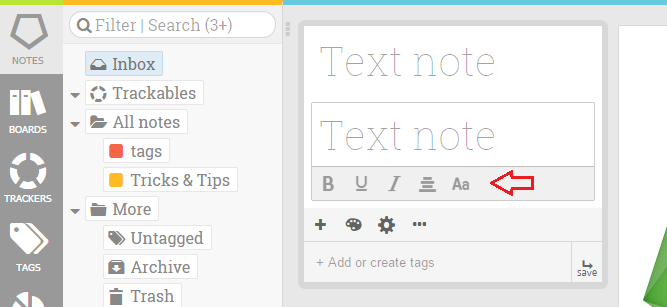
Select ‘Show options’. A set of formatting tools will appear for that specific text block.
From here you can make texts bold, underlined and italic. It also has an alignment tool. In this row, the ‘Aa’ button toggles between fixed small and large font sizes.
You can get a new paragraph by pressing Shift+Enter buttons. As you keep typing, the font size gets smaller to a limited extent. If you want to add a title having large font size, you can simply use a separate block upon the note body.
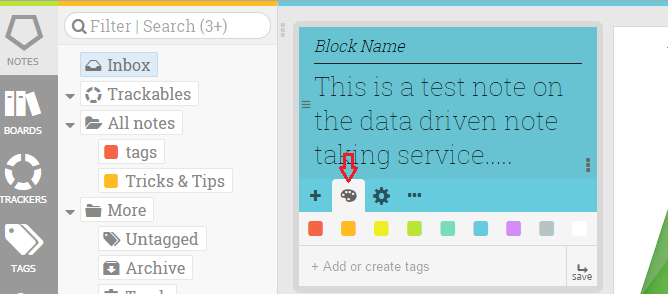
Beyondpad does not allow changing font color. But you can change the note background color easily.
Just select the ‘Change color’ option and pick a color from the provided ones. There is a gear icon next to the background color picker. Clicking on the gear brings ‘Show timestamp’ option. Selecting that shows the note creation date and time inside the note.
Adding a Block Name
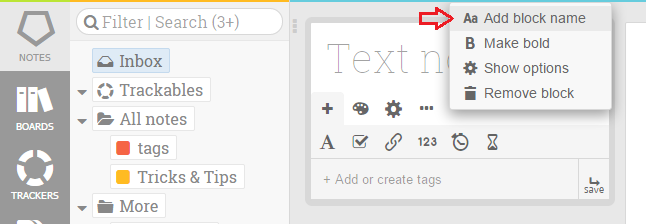
Again, when you clicked the three-dot button from the bottom-right corner of the text block, there was another button for adding a block name.
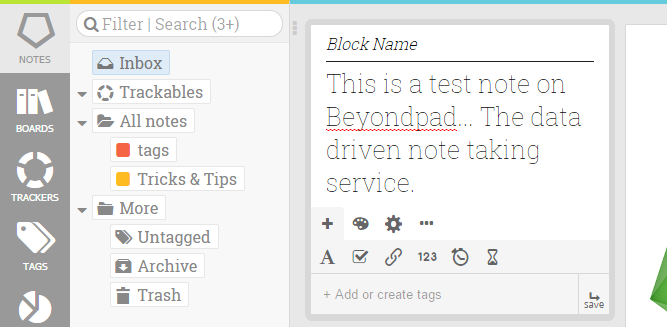
Use this option to add a big-letter title to your block.
Block name can be another way to give a note title.
Linking a Note with Tag
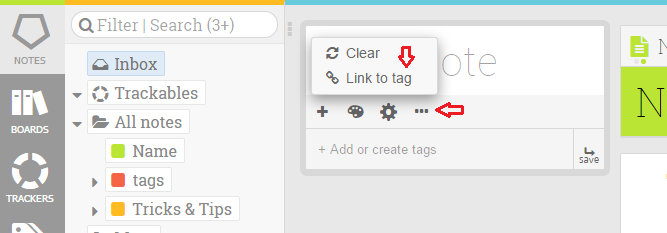
You can link a tag to a note so that both of them can be accessed from one another. To link a tag with a note, click the three-dot (More) button beside the gear icon. Select ‘Link to tag’ option from there.
This option can help you to keep information about a tag because tags may have significance that could be explained in a note. This feature gives a quick access to the tag and the notes linked to the tag.
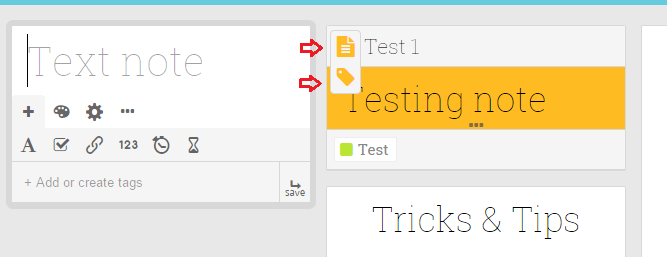
A note which is linked to a tag will show a special sign on its upper-left corner along with the tag text. Hovering mouse on the area will expand in two objects. One is for the note, another is for the tag. Clicking on them will show the respective detail.
Look at the above image, here I clicked on the tag icon first, and this is the tag info. Now notice the following screenshot. There I’ve clicked the note icon.
Interrelationship Among the Tags
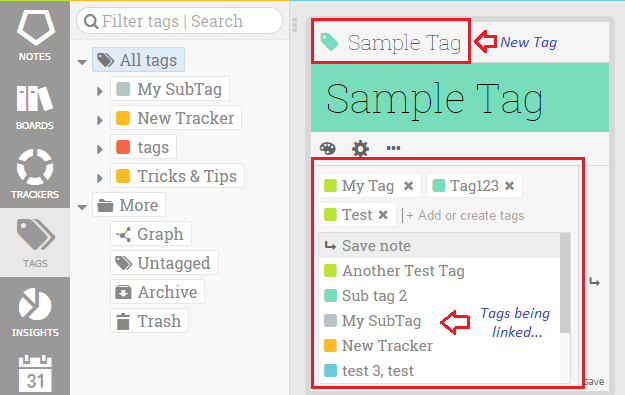
Another creative feature in Beyondpad is its ability to link between tags. Yes, you can connect a tag with another tag so that relevant contents can be organized more easily. In Tags section, while creating a new tag, you can add another tag with it.
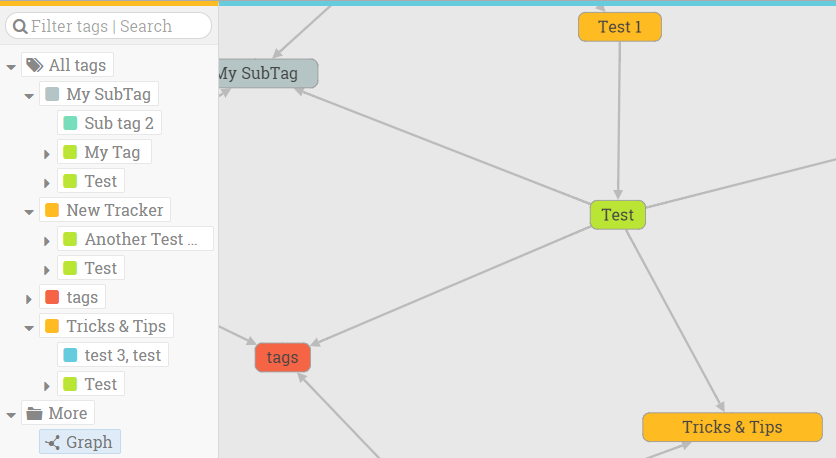
The connected tags make a tree or graph like structure.
Making a To-Do List
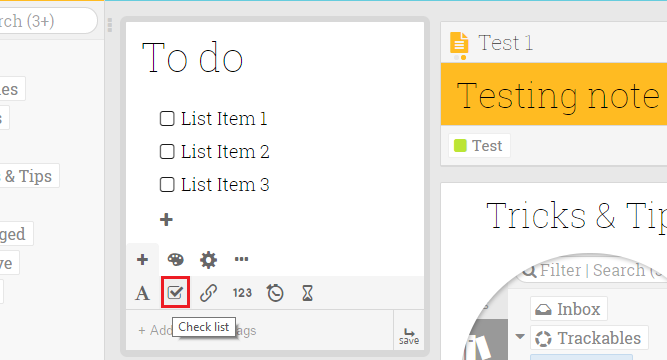
Making a to-do list is easy and it works as you would expect- I mean you can make a checklist and later mark/unmark the list items.
When you mark an item that gets marked as done in strikeout format.
Inserting an Image
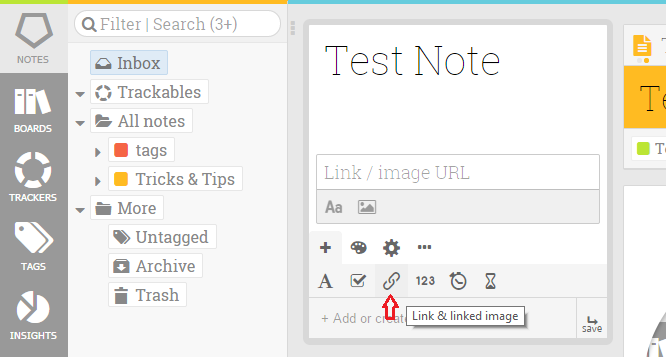
You can put an image on note body by linking it. Click on the link icon and a new link block will open. Here you can paste any link to get in clickable form. If you paste an image link, the image will be shown in the note. I’ve contacted with Beyondpad’s author regarding image uploads. He said that image uploading feature is scheduled.
A title to the link can also be given. While editing, you will be able to toggle between link and image.
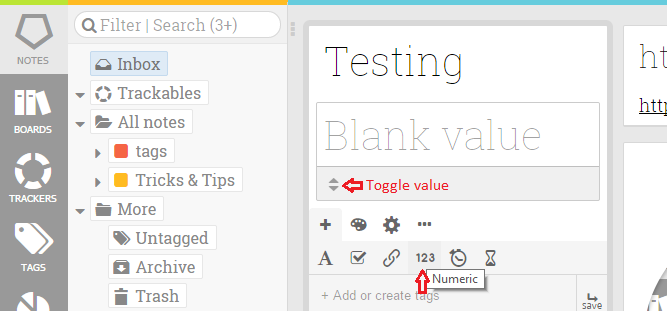
Adding Numeric value
To add a numeric value, click the ‘123’ (numeric) button. Here you will get a toggle control which can be used to increase/decrease the number you entered.
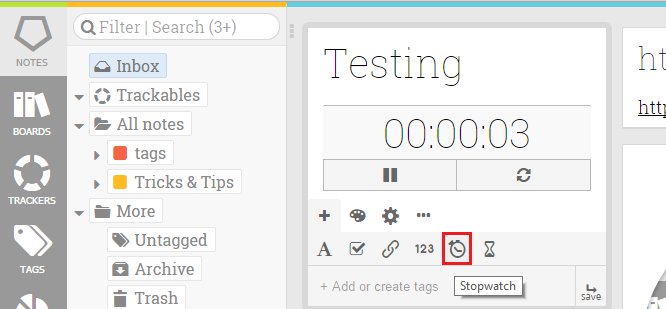
Stopwatch and Timer
You can add stopwatch to your note. The device will be running and show reading live.
Beyondpad offers a timer to make countdown as well.
The timer also runs inside the note! You can edit the time and pause/refresh the time for stopwatch and timer.
Working with Boards
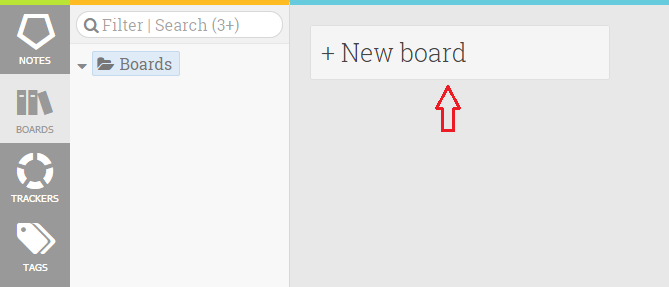
Boards are easy ways to manage related tasks like to-do lists and project tasks. Adding a board is slightly like making an archive of some specific notes with few tags. You can add several lists to a single board. To create a board, visit Boards section of Beyondpad.
Add a new board from here. After saving the board, create lists inside it. Double click on a board to edit it quickly.
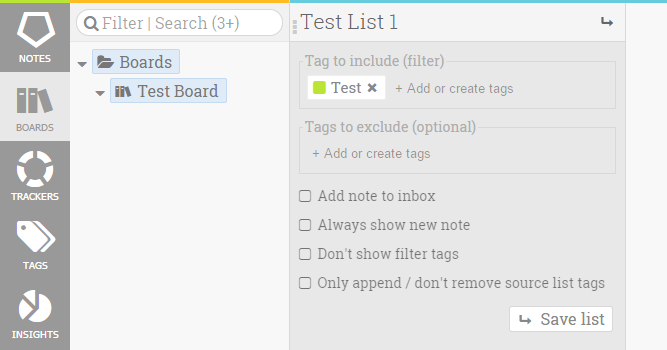
Define tags and other filters for each list. Save them.
Now your board will look like this. From here, you can drag/move notes between the lists. Suppose, your ‘Work’ board has 2 lists. One is ‘To-do’ and another list name is ‘Done’. The to-do list has in-progress contents and ‘to-do’ tag while the done list has completed tasks and ‘Done’ tag. Now, if you move a note from to-do list to done list, the note will change its own tag (to ‘Done’) as the new destination. That means, in boards, notes will always have the tags same as the lists. If you change note location, the note tag will be altered according to the new destination.
Trackers
You can use Beyondpad Trackers to monitor stuffs like income, expenditure, reserved materials etc. Visit Trackers section to start working with this. Trackers are also tags by concept.
You will get ‘New Tracker’ option. Input your data and select the appropriate tools from here.
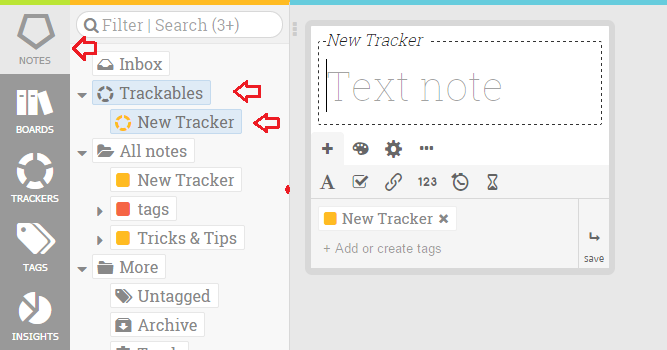
This is a sample tracker. You can create a dynamic tracker by attaching tags (trackers) to chekboxes which then get invoked. Here is an example of dynamic tracker made by Beyondpad team. However, you will find your trackers in the ‘Trackables’ section inside the main notes page.
Settings
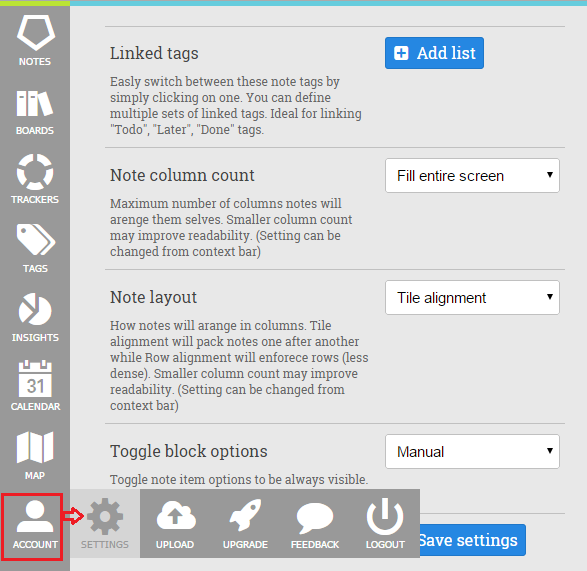
Here is a look to Beyondpad settings.
The Bottom Line
Beyondpad is a fantastic way to organize data in notes form. Since the service is still in development, so I hope it will be more usable and stable with the upcoming features.
And this was my hands-on experience with Beyondpad. Did you try this? Please share your feelings about it via comments. Thanks.









Comments are closed.