
Evernote Web Clipper is a browser extension that can help you to store and share notes easily. You can take notes as text, articles, bookmarks or even the entire web page.
The tool is available for Google Chrome, Internet Explorer, Firefox and Opera. More platforms could be added in future. I have been using Evernote Web Clipper on Chrome for a few weeks. Here I’ll share my experience. First of all, let’s see its pros and cons.
Pros
- The extension is lightweight and easy to use
- Evernote Web Clipper has a rich set of annotating tools
- The standard article and simplified view work just fine
Cons
- The extension is known to have some compatibility issues with browser updates. The Evernote team constantly works to fix these issues.
Summary
I found the extension smooth and functioning. I think you will like this tool to speed up research and collaboration activities.
[sc:evernotebooks ]Evernote Web Clipper Hands-On
I downloaded the tool from Chrome Web Store. It’s nearly 3.7 MB in size. This review is based on the Evernote Web Clipper version 6.2.6.
After the installation, the extension can be found on the upper right side of Chrome (beside the browser’s menu button).
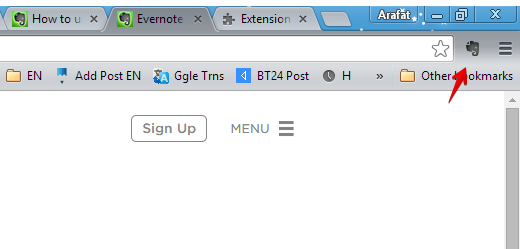
The browser context menu will also get an Evernote Web Clipper item. To use this option, right click the mouse while browsing.

Using Evernote Web Clipper
The tool can be used in major three ways such as, clicking the extension icon appeared on the top right corner of the browser, context menu (right-click) option and keyboard shortcuts.
The below screenshot depicts the use of extension icon method.
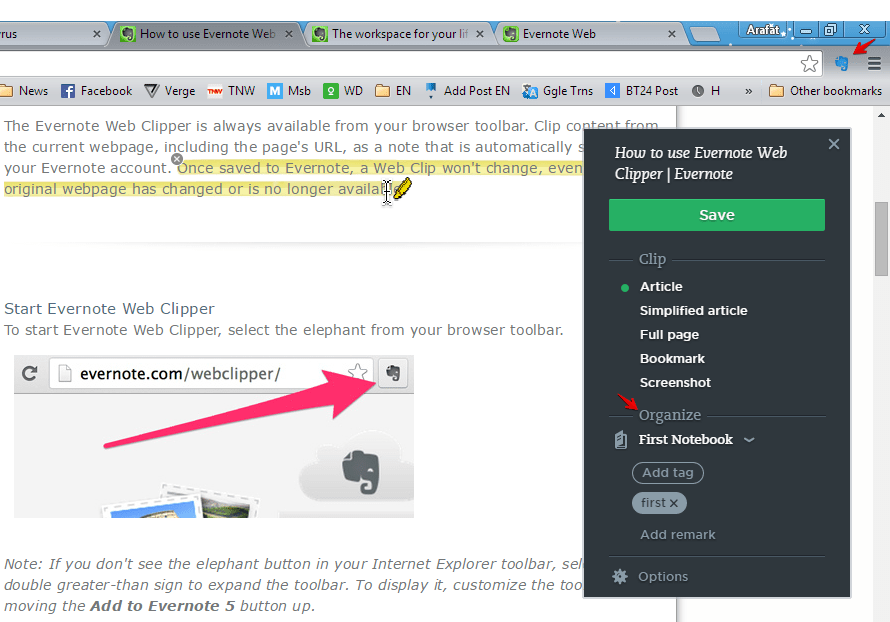
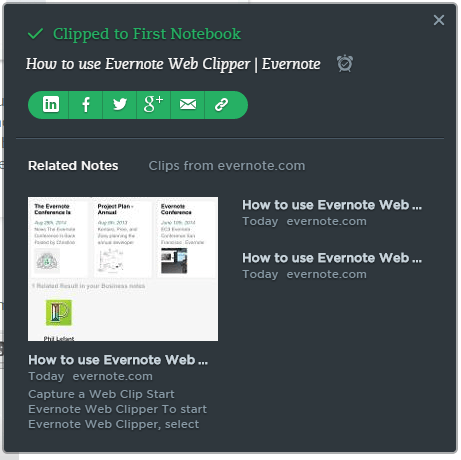
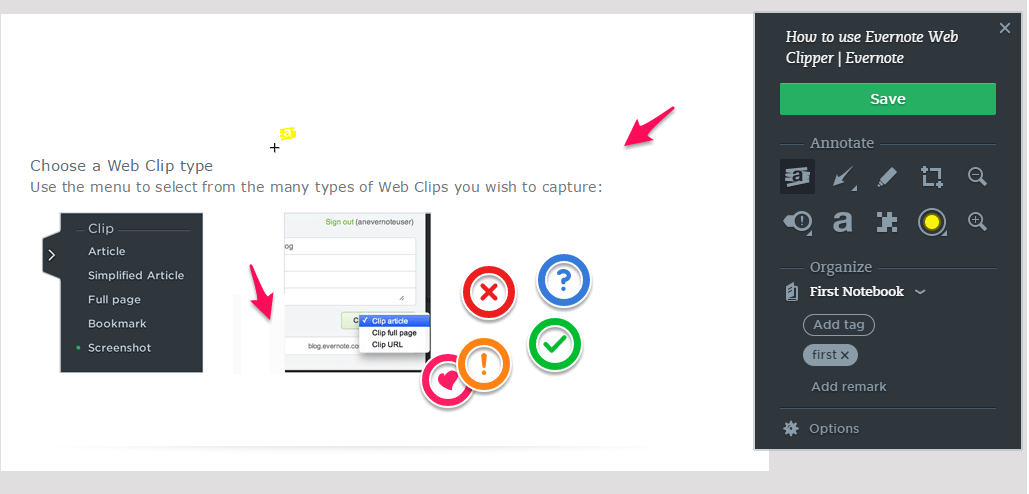
You can select texts using the yellowish tool. Click the ‘Save’ button to store the content as a note. Select the destination notebook and add tags to your note from the extension menu’s ‘Organize’ section. After saving the note, you can open/share it right away. Setting a reminder is also possible from here.
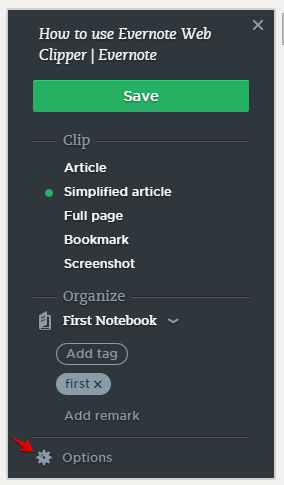
There are 5 modes of saving a note via the web clipper. It allows to store the full web page, bookmark or a screenshot of its contents. The extension can show the page as it is or bring a simplified version dubbed as ‘Simplified Article’. Here is a simplified view.
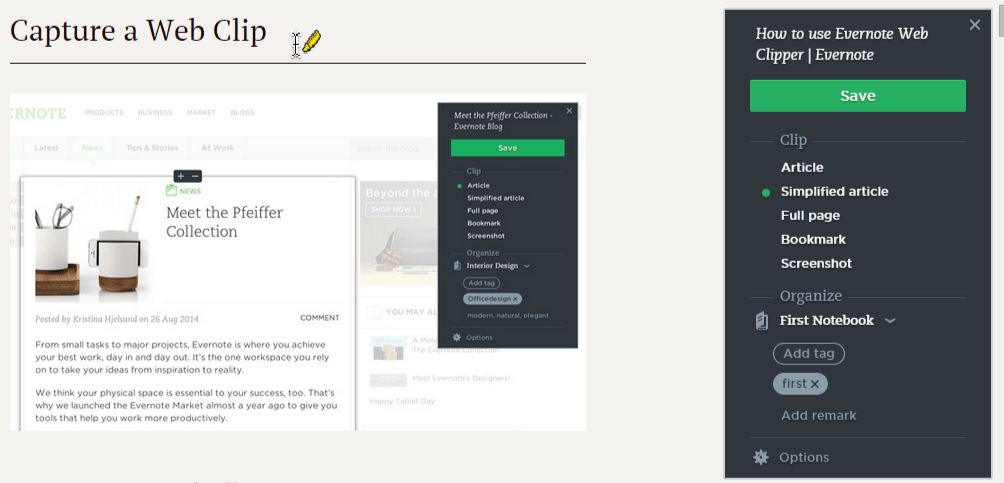
You can select and save texts along with images more easily on this interface. The ‘Full Page’ stores the whole web page on your Evernote account. Later you can edit the contents of these saved pages. The ‘Bookmark’ option saves the URL along with an icon and some description of the webpage.
To annotate a webpage’s contents, the screenshot method can be a convenient way. Take a screenshot using the extension and use its rich set of annotating tools. Click the tool’s extension icon and select ‘Screenshot’ from the menu. Now you are ready to capture a screenshot.
There are lots of things you can do with Evernote Web Clipper’s screenshot feature.
Settings
The extension’s settings and configuration tools are resided under ‘Options’ menu.
Clicking the gear icon brings the settings interface.
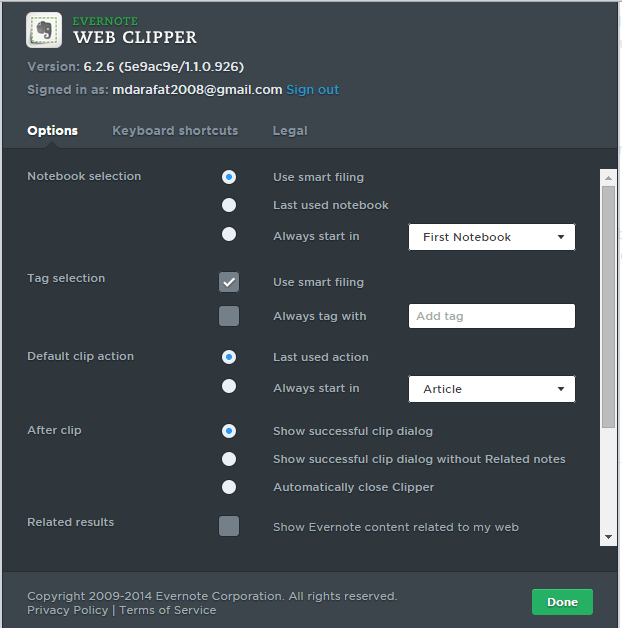
Here you can tweak the extension’s configurations. The keyboard shortcuts are also found in another tab of this same window. Modify or reset them if needed.
….And this was my experience with Evernote Web Clipper so far. I am really enjoying the tool. Have you tried this yet? How did you feel? Please share your thoughts via comments. Thank you.
Comments are closed.