Did you apply thermal paste but don’t know how to remove it? Are you a beginner looking for guidance in cleaning your CPU socket? Or is your CPU overheating, and you don’t know what causes it? Answer these bugging questions and avoid more computer problems and a decrease in performance by reapplying it now.
While thermal paste plays a role in ensuring your rig functions well, there are risks in applying it. There are times that the paste intrudes on other components that will be harder to remove and clean. If it causes too much damage to your computer, you need to replace it.
This article will show you the importance of thermal paste and its application and reapplication.
We’ll show you the 15 pro tips for cleaning thermal paste on the CPU socket.
Jump to:
- What is a thermal paste, and what does it do?
- Do I need to dislodge old thermal paste?
- Materials needed for cleaning and reapplication
- Applying Thermal Paste: Dos and Don’ts
- How much does thermal paste cost?
- The Cleaning Process
- Pinhole socket vs. Pin socket
What is Thermal Paste, and What Does It Do?
The thermal paste helps in avoiding the possibility of overheating. Without it, the full potential of your CPU will decrease, resulting in performance problems, delays in operation, and an even shorter computer lifespan.
Scientifically speaking, it is a thermally conductive compound that aids in transferring heat. Applying removes air gaps between two surfaces to facilitate heat transfer. Relatedly, the application is also performed in building computers between the CPU and CPU cooler to guarantee that the heat from the processor is effectively removed.
Do I Need to Dislodge Old Thermal Paste?
As mentioned, thermal paste helps in avoiding CPU overheating tendencies due to effective heat transfer. When it has already dried out, it should be removed and reapplied with a new one. Why? Long-dried thermal paste cannot correctly perform heat transfer from the CPU to the heatsink. The only solution is to replace it with a new one.
Materials Needed for Cleaning and Reapplication
The whole process won’t be possible without the materials and equipment needed. Make sure you have these things on the list for a smooth process.
- Microfiber/lint-free cloth
- Extra fine toothpicks
- Q-tips/Cotton buds
- Rubbing alcohol
- Thermal paste cleaner
- Surface purifier
- Magnifying glass (optional)
You can find most of these items on Amazon. They are also available in local hardware. If you have them completed, you’re good to start.
Applying Thermal Paste: Do’s and Don’ts
There are some things you should keep in mind before doing the cleaning process. Here are 15 pro tips to clean thermal paste on CPU sockets:
1. Clean Your Workspace
Before everything else, ensure that your workspace is clean. You don’t want any dirt particles to interrupt the process. It could also pose further problems. So, dust off and wipe those particles!
2. Do Not Use Water
Do not use water, even the tiniest small amount, in cleaning your CPU socket. Electronics and water are like water and oil–they don’t mix.
3. Thermal Paste Is Safe
It does not harm your electronics. If it does, it is probably because the thermal paste spreads out to the socket connectors, interrupting the connection.
4. Use A Microfiber/lint-free Cloth
As mentioned in the needed materials, the cloth for wiping should be microfiber and lint-free. Using paper towels might scratch the components. So, be careful.
5. Use Latex Gloves
We suggest you wear latex gloves to avoid sweat getting into the parts. Your oils may disrupt the functionality of the parts.
6. Wear Anti-static Bracelets
Anti-static bracelets help in preventing dangerous situations related to electricity. It protects you and your computer from experiencing static electricity discharge.
7. Refrain From Using Your Hands To Spread The Thermal Paste
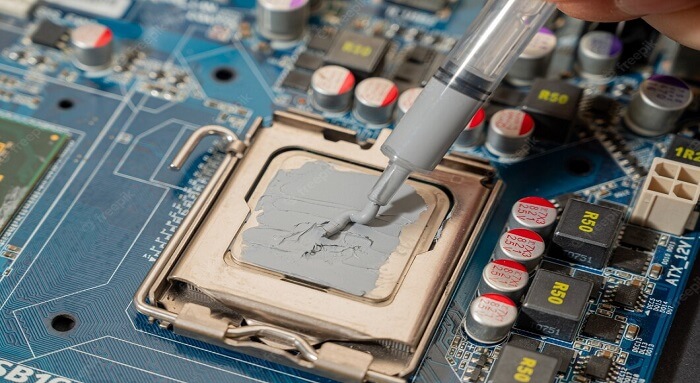
Put a small amount–like a dot– of thermal paste into the heatsink. It will automatically spread without problems.
Manually spreading it using your hands causes tiny air bubbles to appear. This interrupts the heat transfer process.
8. Follow The Outside-in Technique
In removing the thermal paste, push it from the outside. In a way, you are not causing any fluid to enter your computer.
9. Choose A Good Brand
Buy a thermal paste cleaner and purifier from a brand with great reviews. It is difficult to take risks and try new brands without good ratings. Invest in a product that can make the process easier. These are the two types of thermal paste:
- Conductive thermal paste – has higher thermal conductivity but requires extra care in applying. Avoid spilling this, or else you’ll shorten your motherboard’s lifespan.
- Non-conductive thermal paste – has a lower thermal conductivity that is good for beginners. Still, you should be careful in applying it.
10. Check The Thermal Paste’s Density
Besides the brand, choose a thermal paste with higher viscosity. Avoid the watery thermal paste to decrease any chances of spilling it onto your motherboard.
Always choose the proven ones to ensure good thermal conductivity. It determines the performance of heat transfer from the CPU to the heatsink. Look for a higher rating number to secure this.
11. Clean The Thermal Paste Annually
Intel, one of the popular chip manufacturers in the global market, suggests that it should be cleaned “every few years” or whenever you “remove your cooler.”
While this is the suggested duration, watch your PC’s temperature. Higher temperature is a sign of thermal paste drying up.
12. Always Apply A Small Amount Of Thermal Paste
Only a pea-size amount should be applied to the heatsink. If you need more than that, you can constantly reapply. It is better to put less than more. A lot of residues might damage the parts. It would also be harder to clean them.
13. Buy A Amall Amount of Thermal Paste
Since only a tiny amount of thermal paste should be applied, you don’t need to buy a significant volume. Remember that you cannot reuse it once opened. Be practical.
-
How Much Does Thermal Paste Cost?
A 3.5g Arctic Silver 5 AS5 Thermal Paste costs about $8.99 to $14.99 plus the shipping fee. The 99.9% micronized silver thermal paste is non-electrically conductive and will not separate, migrate, bleed, or run.
14. Use About 90% Rubbing Alcohol
Alcohol is the alternative in case a thermal paste cleaner is unavailable. Use about 90% rubbing alcohol to do it effectively. Similar to thermal paste, use a considerable amount only.
15. Use Acetone To Clean
Another alternative is acetone. However, it should be the last resort. Please do not use it with any plastic computer components, or you’ll melt them! Nail polish remover and acetone can be unsuitable due to their contaminants.
With these tips in mind, let’s proceed to the actual cleaning process:
The Cleaning Process
The cleaning process is the pre-application of thermal paste. The most crucial info to remember is to remove the motherboard of your computer first before cleaning the CPU socket. Neglecting this step leads to complexities.
So, there we have it; let’s start cleaning the thermal paste on the CPU socket.
1. Identify Your CPU Socket
Before proceeding to the removal, cleaning, and reapplication proper, there is prior information you should acquire: two different socket types.
Knowing what socket type you have is crucial to avoid further complications. Take note that each type has its own cleaning method.
-
Pin Socket (LGA)
Pin socket (LGA) is usually used by Intel Core CPUs. It has an array of tiny pins, and the CPU has rounded connectors on the underside for easier installation.
-
Pinhole Socket (PGA)
Pinhole socket (PGA) is usually used by AMD for Ryzen CPUs. It has an array of holes that directly inserts the pins of the CPU into the socket. This is more difficult to clean compared to pin sockets since it requires additional force and patience to clean the tiny holes.
Now that you are briefed on the types of CPUs, let us go to the materials you will need to successfully do the cleaning process.
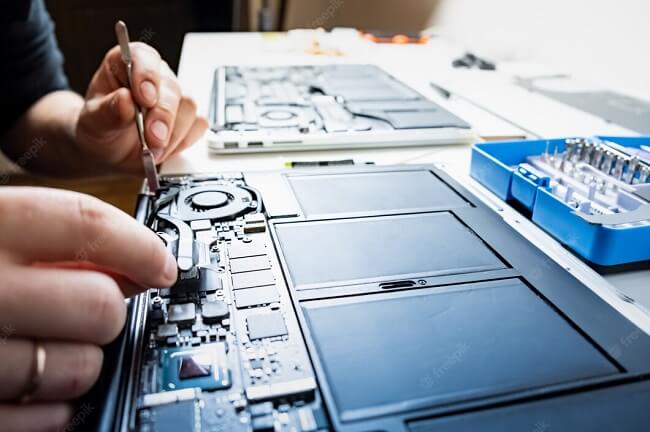
2. Remove All Motherboard Components
Make room to clean the CPU socket by removing all motherboard components. The cleared space will help you work efficiently. You will also avoid destroying other parts unintentionally.
We suggest you run your computer for 15 minutes. The thermal paste will soften up due to heat, making it easier to remove the CPU cooler.
3. Determine The Pin Direction Of The LGA Socket
The pins on the CPU socket stick out at 45°. They are fragile and bent easily, so you must be extra careful cleaning them. Wipe them in the same direction as the pin bend. To determine this, use a magnifying glass or a camera using zoom in feature
Start cleaning from the pin’s base end to the tip. Follow this motion in all pins. Otherwise, the pin will bend and grip the cloth you’re using.
4. Apply The Thermal Paste
After cleaning the pins, you can now apply the thermal paste cleaner in a pea-sized amount straight toward where the old thermal paste is located. Put enough cleaner to fill in all the gaps and holes between the pins. Make sure to be careful in applying because too much might lead to saturating the whole socket.
5. Let The Thermal Paste Cleaner Stay
Leave it for five minutes to remove the old thermal paste from the surface
6. Clean The CPU Socket
The CPU socket requires cleaning as well. For LGA socket pins, use a cotton bud to brush the pins in the correct direction gently. This is true in lifting the cotton bud away from the CPU.
While cleaning, be cautious of the thermal paste that comes off spontaneously. Change the cotton bud right away, and do not let it build up.
For PGA sockets, use a toothpick and pick the holes gently and carefully. This is to remove the thermal paste stuck in the holes. Afterward, use another cotton bud to wipe the excess.
7. Remove The Cleaning Fluid Excess
Mop up the remaining cleaning fluid to finish the process. For LGA sockets, gently use a cotton bud at the end of the pins to absorb all the excess fluid. Keep doing this until it is saturated. As for PGA sockets, press the CPU socket using a cloth to absorb the fluid. Then, use a cotton bud to draw out the excess liquid from the holes.
8. Repeat The Cleaning Process
Redo steps 4-7 until you are confident the CPU socket is clean enough. This helps you in redoing all the steps from the start.
9. Dry The Motherboard
It is drying time! Once the CPU socket is clean and the pins can be attached, you may dry the motherboard for at least 24 hours. Leave it in a place with a moderate temperature.
10. Clean The Contact Surfaces
Use a contact purifier to clean the contact surface. There are many solutions out there, but we recommend Arctic Silver.
Put just enough drops onto the cotton bud. For the LGA socket, gently brush in the pins’ direction. For the PGA socket, press the cotton bud with the solution into the holes.
If there are still thermal drops coming out, redo the cleaning steps.
11. Dry The CPU Socket
If you are sure that the CPU socket has no excess fluid, dry the CPU socket for 24 hours.
12. Reassemble The Components
After drying, put the components back into place. Then, reinstall your computer.
13. Test the PC
The last step is to test if the PC is working. There will be no problems if the steps above are properly done. If it is not working, there might be an amount of thermal paste left in the sockets. Redo the whole process, and make sure it is intricately done.
Our Final Take
We hope these tips and steps in removing thermal paste and cleaning your CPU help! Make sure to invest in good products to avoid spending more money on repairs.
Always ask for more tips and assurances to avoid unnecessary complications. Cleaning computer components is a risk you should always prepare for.